John/Horace
-
Posts
1,829 -
Joined
-
Last visited
-
Days Won
186
Content Type
Profiles
Forums
Gallery
Everything posted by John/Horace
-
 Cam sensor issues can prevent a car from starting. And cause cylinder misfire codes. It seems there is a relearn procedure, but diagnostic trouble codes will prevent procedure from being done. So they have to be cleared first. Using a multi meter the cam sensor wire harness and sensors need to be tested first before trying a relearn. Supply voltage of 5 volts, correct ohms for cam sensors; feed from ecm to actual sensor plug. So wiring diagram needed as well.
 -
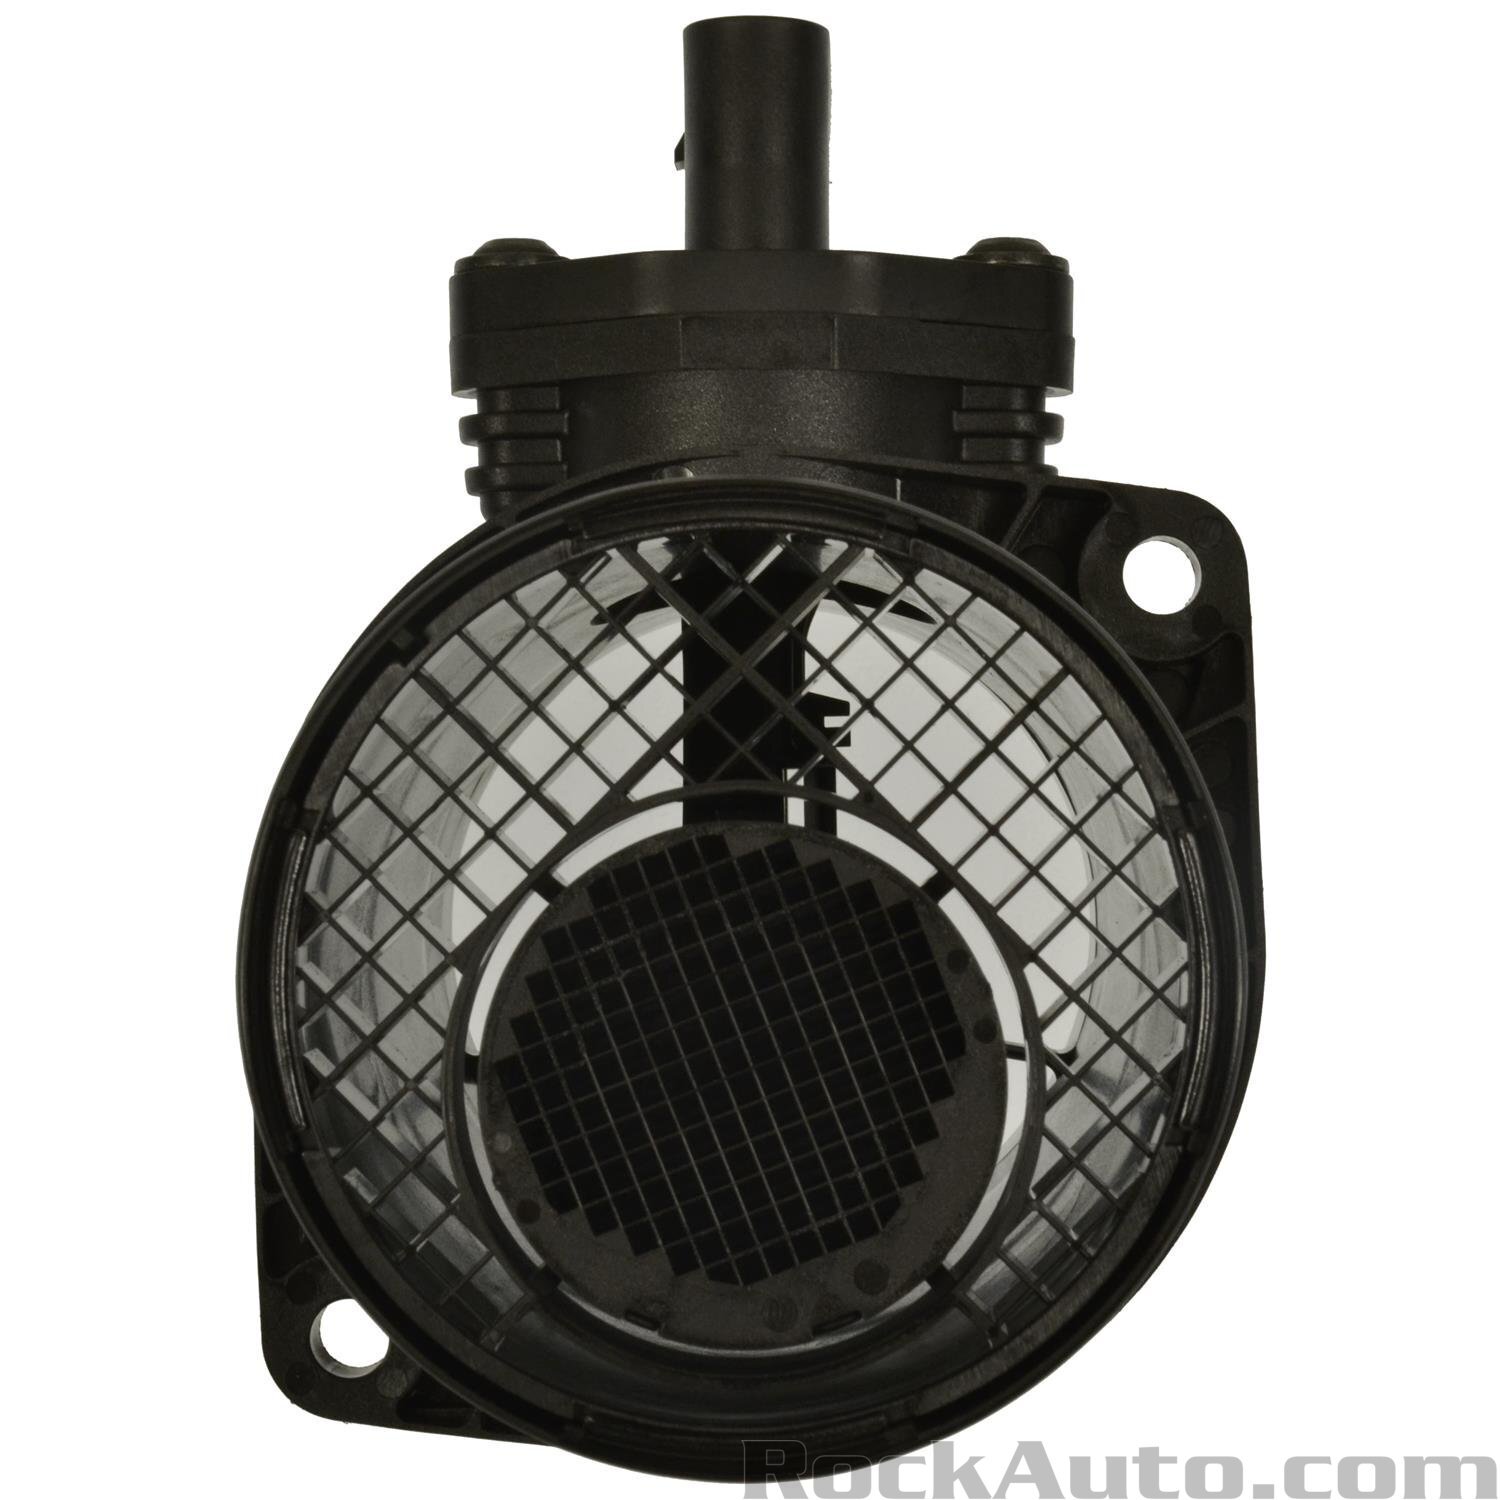
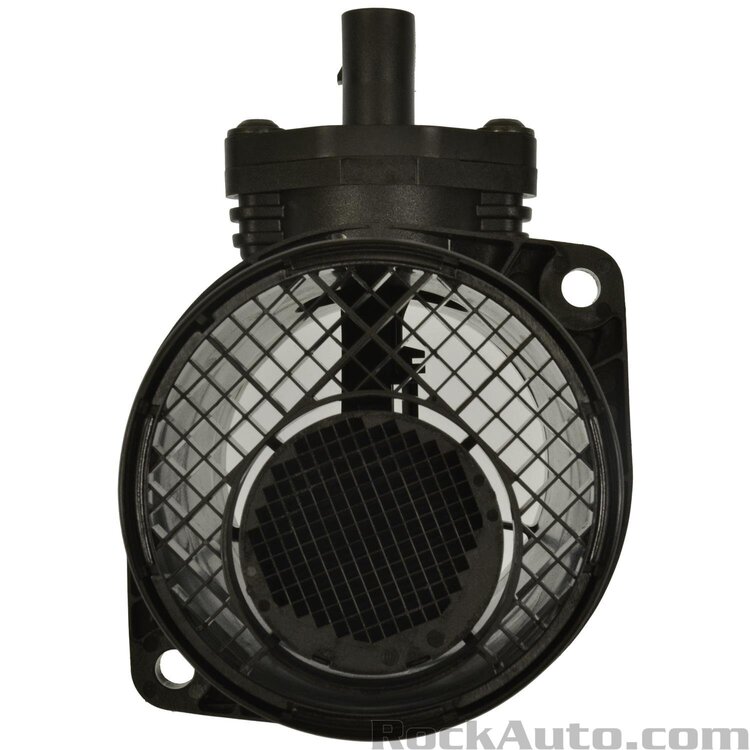
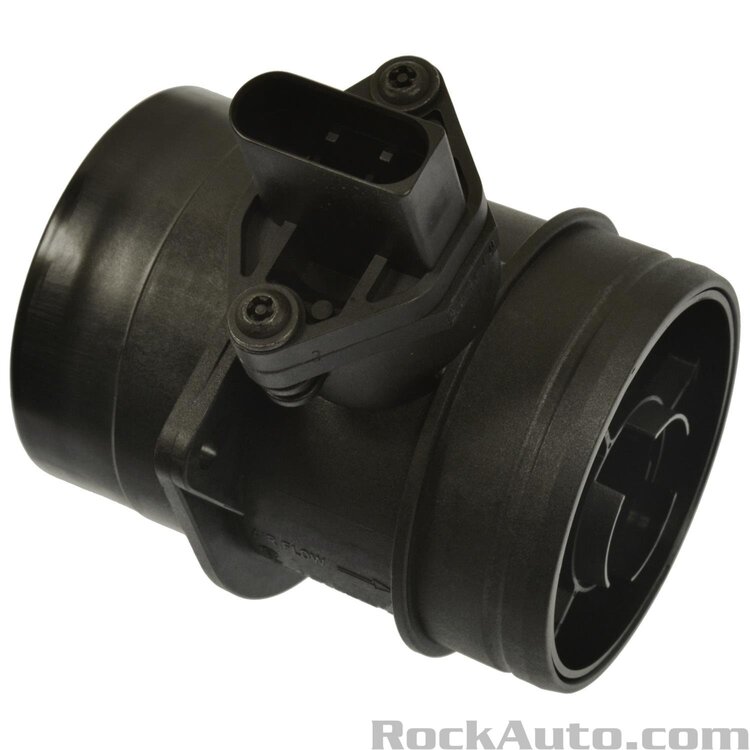
Wow you have been busy. Often crank sensors are plug and play, cam not as likely. Your listed codes could be so many things. You mentioned a few posts back about breaking map sensor and gluing it. The 3.6 has one, you have a maf mass air flow sensor. They can get dirty and cause rich codes and rough idle etc. and the listed codes. Need special spray cleaner to not wreck it. It’s located in the intake air ducting. Simple and worth trying. Should not be any broken tiny wires in the fine mesh.
-
Have you put a wrench on crank pulley bolt and tried to manually rotate engine? This is an aluminum engine block and heads with c.i. liners. Not as tuff as cast iron engines. Hoping thats not the problem.
-
What voltage is the battery showing. Put a charger on it or try jump starting the car. These push button start set ups need a good strong battery or they won’t try to start. If battery good, yeah check fuses.
-
I have swapped Journey batteries more than once. I think the pedestal is just big enough for the larger group 34/78. However the hold down bracket probably is not. If you have access to a welder, you may be able to modify it. Another option is staying with 86 and going to a AGM style battery for approx a $100 more. Faster charging, slower discharge when sitting. All Lexus and other luxury cars ship with them. Better for high electrical load newer cars.
-
2010 Journey/2011 Journey transfer case
John/Horace replied to Rybolt's topic in Engine & Transmission
And some say ask LKQ or other auto recycler. That is their business. The 3.5 was also used in other FCA vehicles like the charger and 300 which also had awd. More were sold so might be easier to cross reverence that. Ask a transmission shop. They often deal with this stuff. Might also suggest going 2 wheel drive for now. -
Audio off
John/Horace replied to Pops's topic in Audio, Infotainment Navigation, MyGig, UConnect, etc.
Start with basics. Make sure fuses for radio and dash controls are good. Journey are prone to ground issues in salt belt areas. Bother front strut towers have multiple grounds held with 10 mm bolts. Remove them and clean up until shiny, add light film of dielectric grease. Some people even remove body paint to bare metal right at mount location, then add dielectric. -
You are correct the 8 passenger 75 T&C had catalytic converters on it. Canada always adopts the highest emission rules …so California spec. Unleaded gas came in at the same time. Big hits to fuel economy and performance. The 5 mile an hour bumpers came out shortly after that, ugly heavy chrome suckers with shocks built in. Must have added over a hundred pounds per vehicle. Full frames were still std design as well.
-
Thanks for the pic. It is kinda neat, didn’t know they existed. Curious about he drive line. Maybe a big 440 v8 with a Holley four barrel and a 727 three speed automatic. Like my dads 1975 Chrysler Town & Country station wagon had. Very stout mechanicals. But a lot of Journeys…to the gas station. But fun times.
-
Cylinder 3 misfire won’t leave me alone. Help
John/Horace replied to DaisyDukes's topic in Engine & Transmission
Wow sounds frustrating. You have covered pretty much all the bases. A node light clips on the injector wire harness and flashes to show a good strong constant signal to the injector. When engine is acting up it needs to be used on your wire harness. If it shows an issue in your case It would probably indicate an ecm computer problem. Not a common failure item and not cheap to replace. Remanufactured units are available. -
Sometimes they can cut out so quick there is no code stored when CPS is bad. Look closely at the wire harness leading to the sensor make sure it has no signs of insulation damage. Light film of dielectric on sensor contact surfaces is always a good idea. The year, the milage and engine were listed…nice to have someone who understands forums.
-
Use Waze or a gps for speedo until you figure it out. Fairly accurate. Look for wire harness damage, critters could have chewed a connection. It’s a lot of codes at once.
-
Often the lightning bolt symbol is tied to a electronic throttle body sensor issue. Not always with a clear code pointing to it. This sensor works with the accelerator pedal sensor, and it is a common failure item. If you have the other engine, try swapping over the throttle bodies. The plastic gears in throttle sensor wear out and cause problems. The original part is made by Hitachi. Rockauto sells,it.
-
2010 Journey/2011 Journey transfer case
John/Horace replied to Rybolt's topic in Engine & Transmission
Auto wreckers have the ability to cross reverence what fits different years. I highly doubt they are inter changeable. Have you tried just removing the drive shaft and leaving vehicle as a two wheel drive. Might have a light on dash but usually vehicle runs fine. With the 3.6 engine awd several people have switched to two wheel drive on this site. -
Battery losing connection
John/Horace replied to samanthalynn98's topic in Electrical, Battery & Charging
Ignore battery temp sensor comment, the 2009-10 didn’t have this, the newer ones have a bms system with a current sensor on negative terminal. Yeah like laryl is saying. Grounds are important because current/ power has to flow some where. No ground can be as bad as no power feed. Both the front struts under hood have multiple grounds held in place with small bolts. In the salt belt these grounds can get corroded and dirty. You can soak with penetrating oil first, then remove each of these grounds. Scotch brite or sand each connection until shiny again. Some people even remove body paint to bare metal at small contact points. Then a light film of dielectric grease is needed on all cleaned surfaces. Not much, just a film. No worry about shocks or arcing, these are ground connections. Also after battery new terminals are tightened. Always grab each one with a gloved hand and try and see if they will twist or move. If so they aren’t tight enough; torque until they can’t be easily moved. -
Amphibious VW ...Dodge needs one!
John/Horace replied to John/Horace's topic in Articles, News & Reviews
My first car was a standard super beetle. I had a total of 5 beetles over a number of years, and a vanagon. First full engine rebuild I ever did was on a beetle. Only two had the gas heater option. I had a lot of good times fixing my beetles. Never owned a new one. They were one of the cheaper cars on the road, yet still pretty reliable. -
2016 journey, power window problems
John/Horace replied to bynarie's topic in Electrical, Battery & Charging
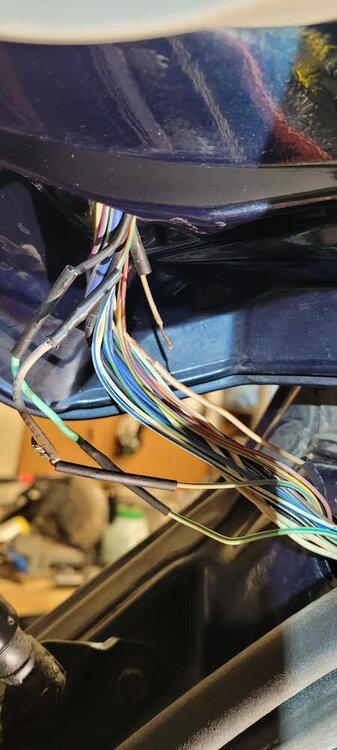
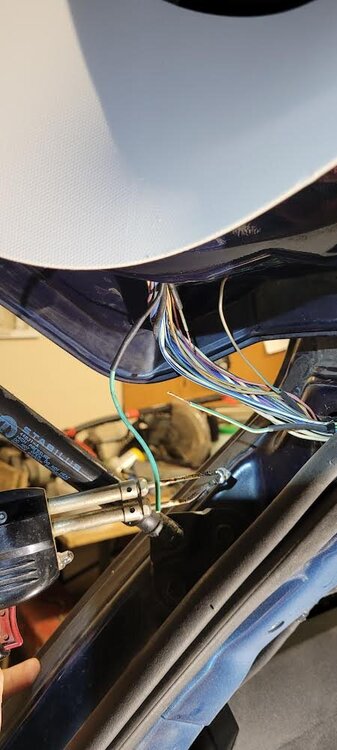
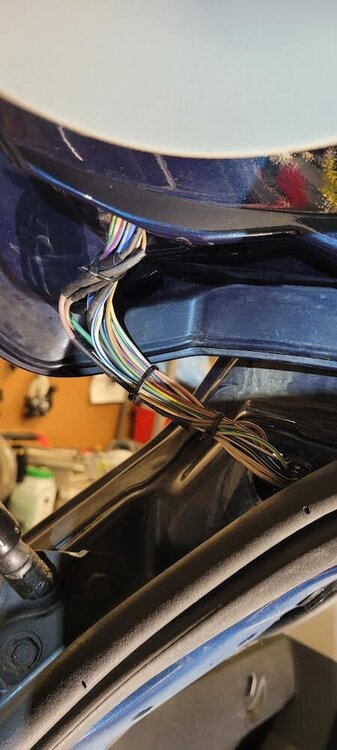
Checking the wires visually is useful but you didn’t always see wires that are broken off completely. Automotive wire is usually multi strand copper wire. Three quarters of the 50 ish strands might be broken so instead of battery voltage some wires may only carry 5-6 volts…or not enough amps. To function properly. You could take the rubber boot and gently flex the wires a bit with the door open. Then try cycling stuff. If it works momentarily you have found some partially broken wires. Another way is to use a multi meter and measure actual voltage and continuity (broken grounds without power can also disable stuff) on all the wires in the door loom. You could also buy a complete new driver door wire harness. Probably not cheap.- 10 replies
-
- 2
-

-
- windows buttons not working
- windows
- (and 2 more)
-
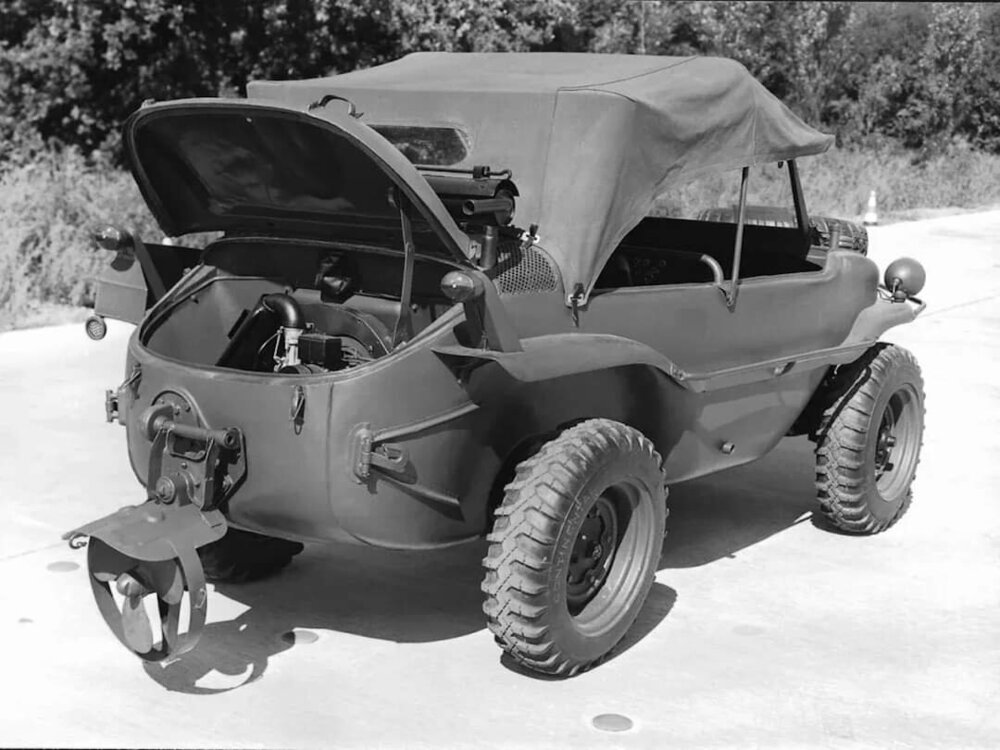
Very cool, first time I have ever seen this. The Volkswagen Type 166, better known as the Schwimmwagen, shown with its canvas up and engine cover opened. The Schwimmwagen is a really cool amphibious car that was very popular among anyone who got their hands on one during the war. They had a smooth bottom, a boat-shaped body and a propeller at the rear. They were powered by a rear-mounted air-cooled boxer engine. https://militaryhistoria.com/schwimmwagen/
-
Another person with broken wires in the hatch harness. Lost the high brake light led last year and recently the remote lock switch on the hatch close to latch handle. Slit the boot and get out the heat shrink, solder,flux, soldering iron and tye wraps. Found two severed wires and one cracked soon to fail wire. Around an hours work if you can solder. About $5 in materials.
-
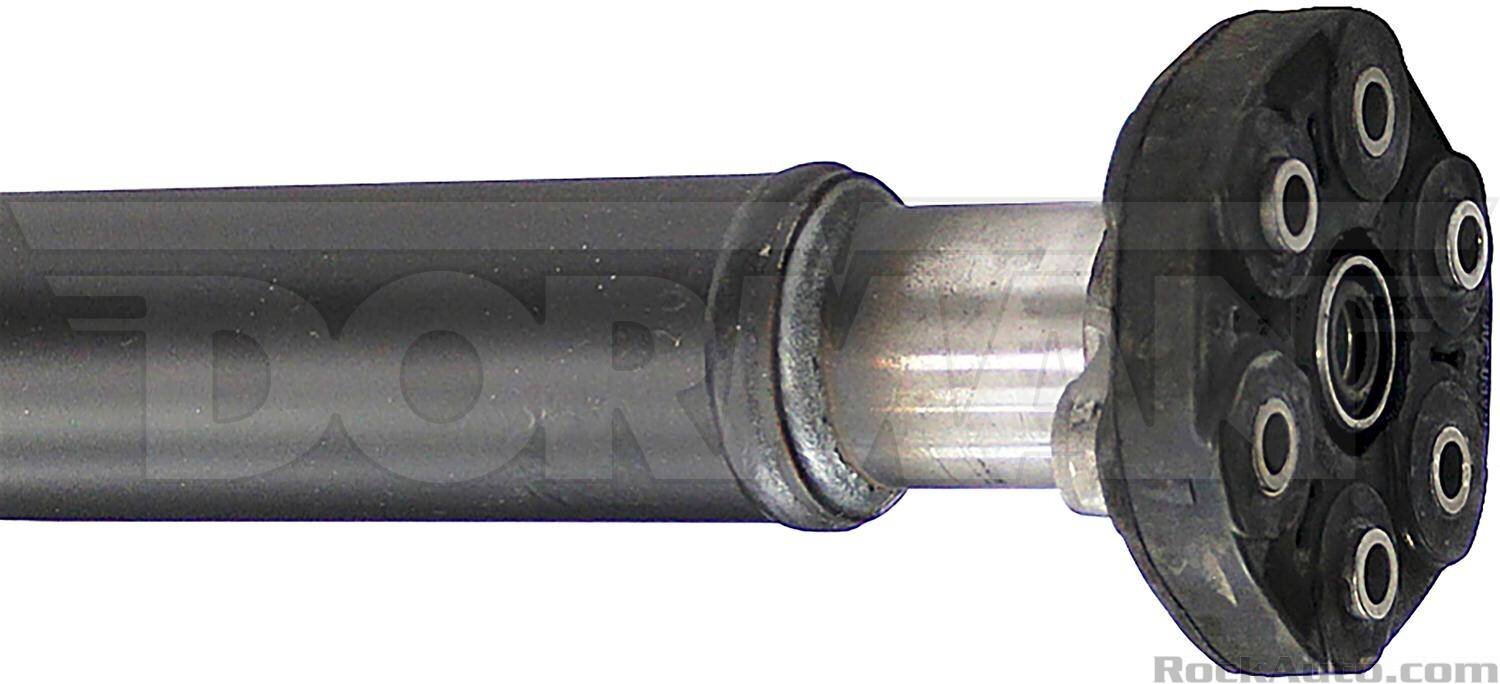
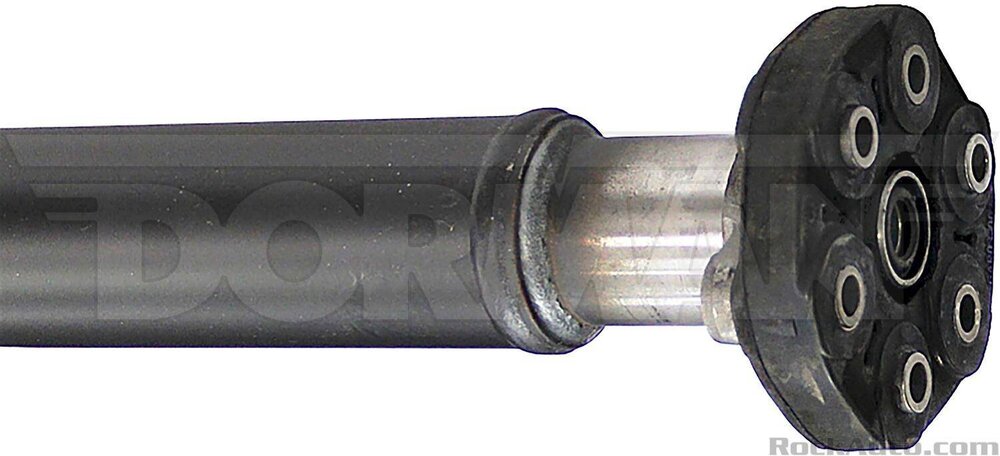
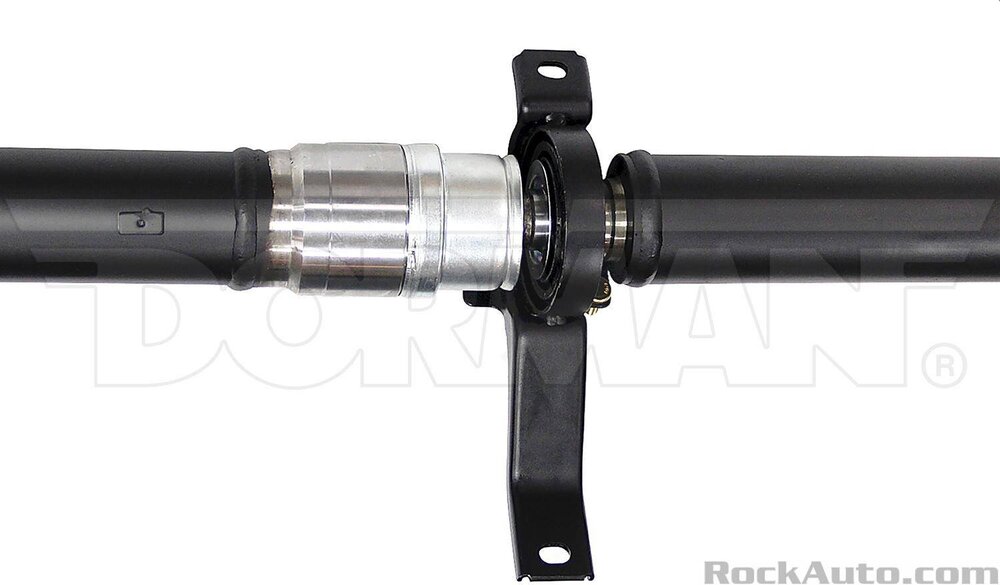
The rubber insert coupling is around $75.

-
Might work. Did you snug up the main casing bolts, might help too. The casing is aluminum magnesium alloy, a porous dirty metal. Lacquer thinner or other degreaser like acetone might be better. If first rtv fix fails. Could also drain diff during fix to reduce seeping. Make sure vent hose on rear diff is not plugged. Remove it and blow air through. This could be the actual cause of the leak. Air inside diff heats up and differential pressure forces oil out via leaking. Has happened to other journey owners before.
-
Need to remove inner door panel and see what’s going on. Often there is a scissor type mechanism bolted to bottom of door window track. Needs to be able to pivot freely and self centre as window is guided upwards. If a bushing is worn or something is sticking the sides of window will bind and create noises. A few different styles of window mechanisms out there. I’ve never looked at a Journey one, so they must be fairly durable. Have played with other brands. Inspect and/ or replace window regulator assembly…could be in play. Watch your fingers. Free advice worth everything you pay for it.
-
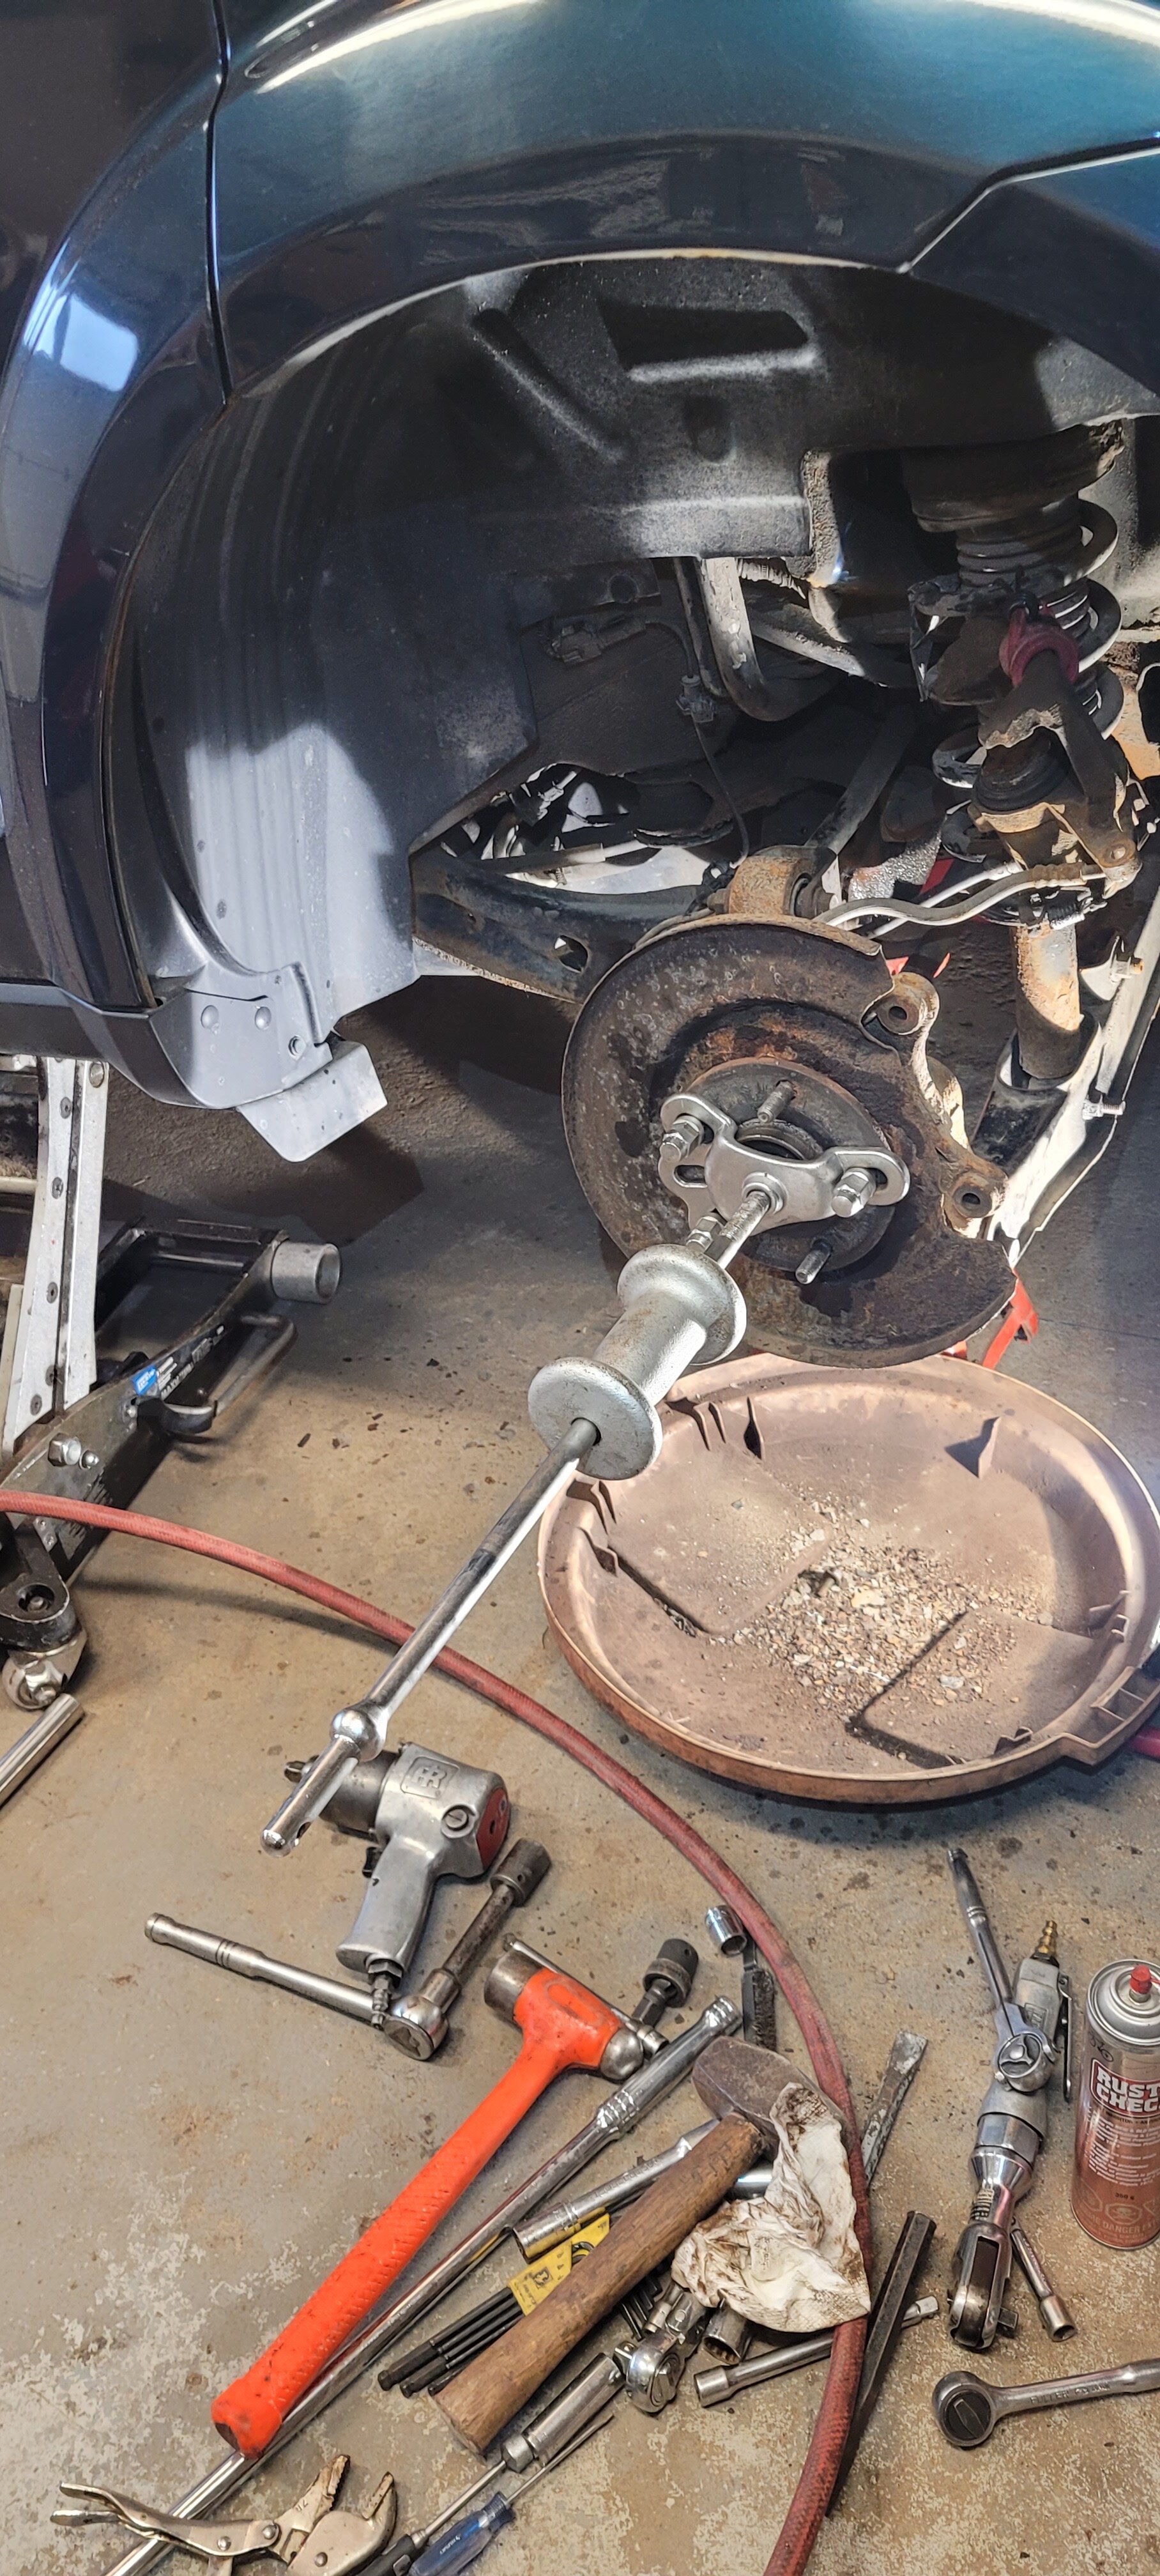
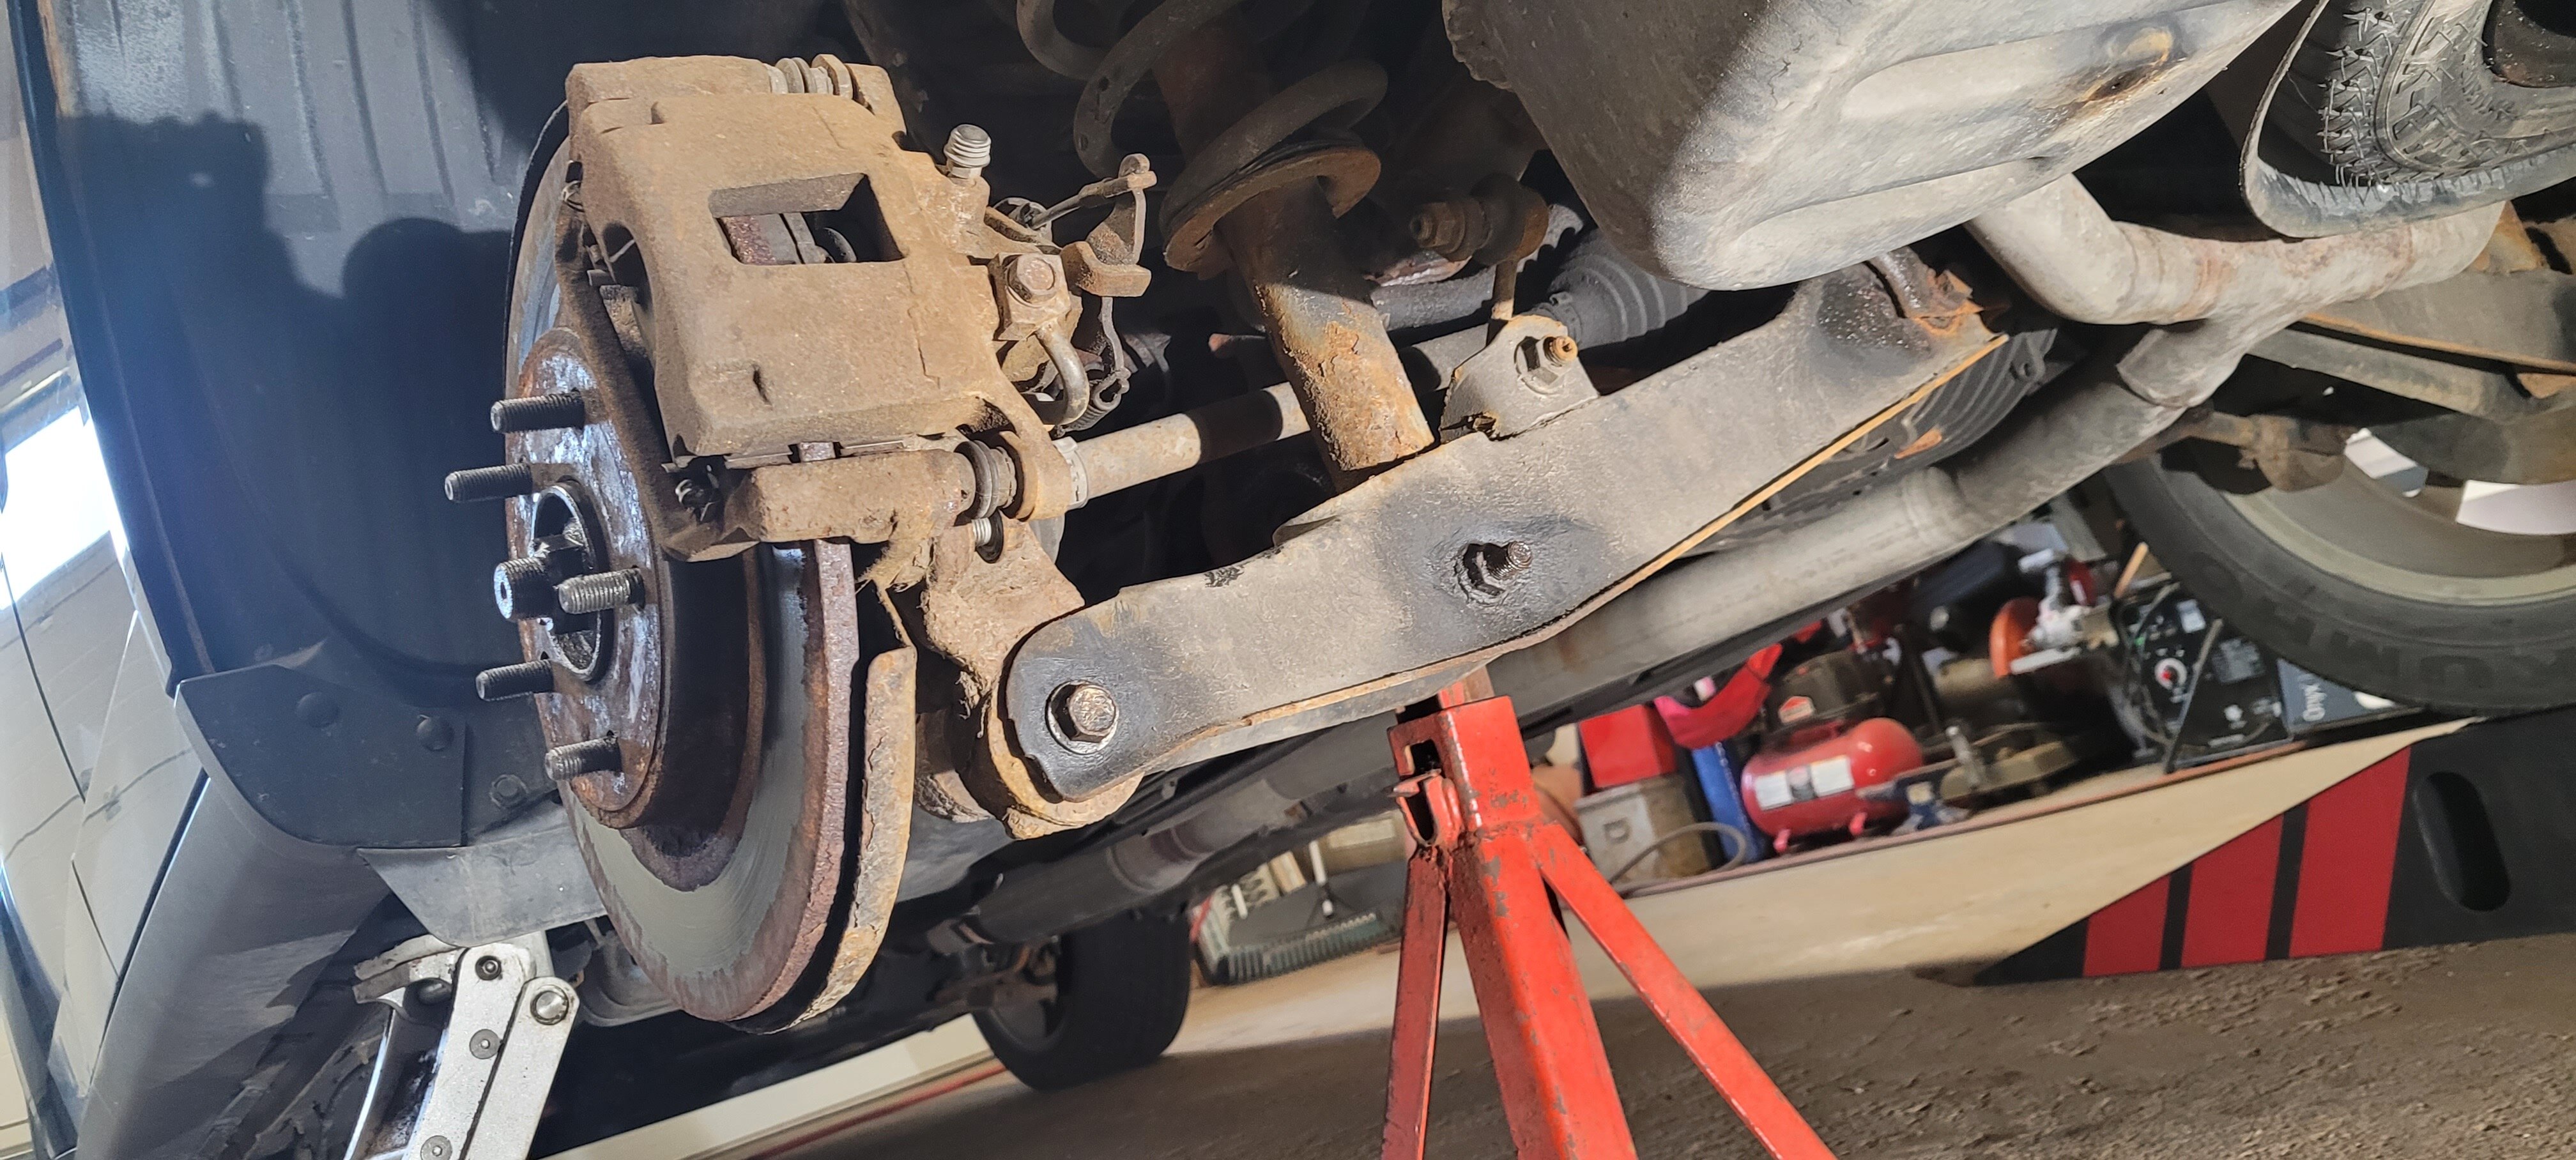
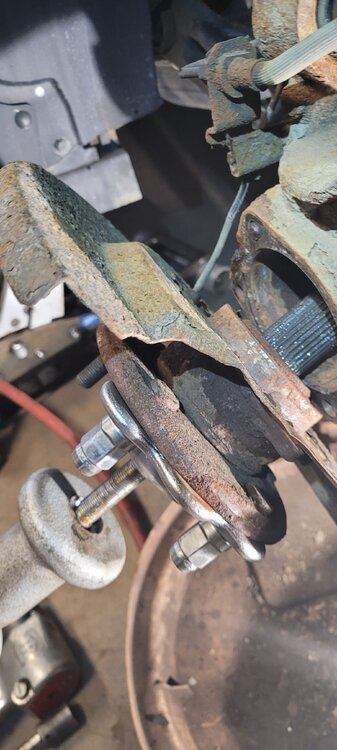
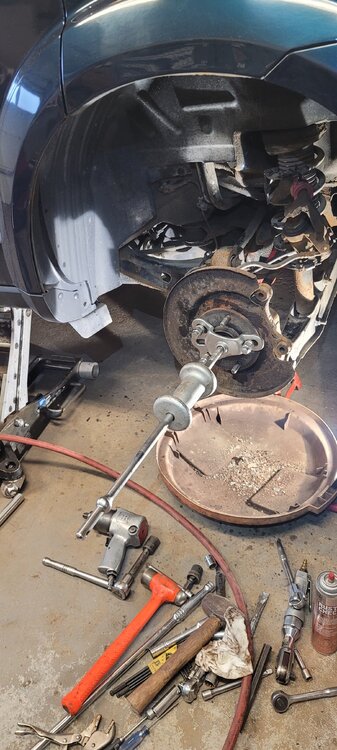
In the salt belt, stuff like wheel bearings can be a bit of a bear. Even a Journey that was rust check sprayed 3-4 times like this one. If you are changing a loud bearing hub on an awd model. You can leave c/v shaft in place fairly easily if you have access to a sliding hammer. If diff lip seals aren’t leaking it’s easier/faster to not disturb things. Mine were already changed few years ago. Original bearing had 250k kms or 155k miles, not bad really for the crappy roads vehicle was driven on.

-
Sounds very frustrating. Trouble shoot temperature probe. Measure value at hood probe harness plug and then the output value that arrives at the pin coming in to pcm. Cold and at 200F when error occurs. Need pcm pin out diagram, Mitchel log in. Maybe probe or harness issue.
-
Washer Spray Issue
John/Horace replied to MarkCee's topic in Glass, Lighting, Mirrors, Sun Roofs & Wipers
Crap in the lines maybe. Flush out a bit before nozzle outlet. Check bottom of reservoir for grit. Hood jets fragile and pricy, be careful. How is hatch spray, normal. There are two pumps on system.