John/Horace
-
Posts
1,834 -
Joined
-
Last visited
-
Days Won
188
Everything posted by John/Horace
-

2013 Journey SXT front & rear brakes torque specs
John/Horace replied to Kernel's topic in Brake, Chassis & Suspension
These are 2009-2010 specs, which are very close. Especially for an uncalibrated Harbor Freight torque wrench. Mitchel on line login will have exact 2013 specs.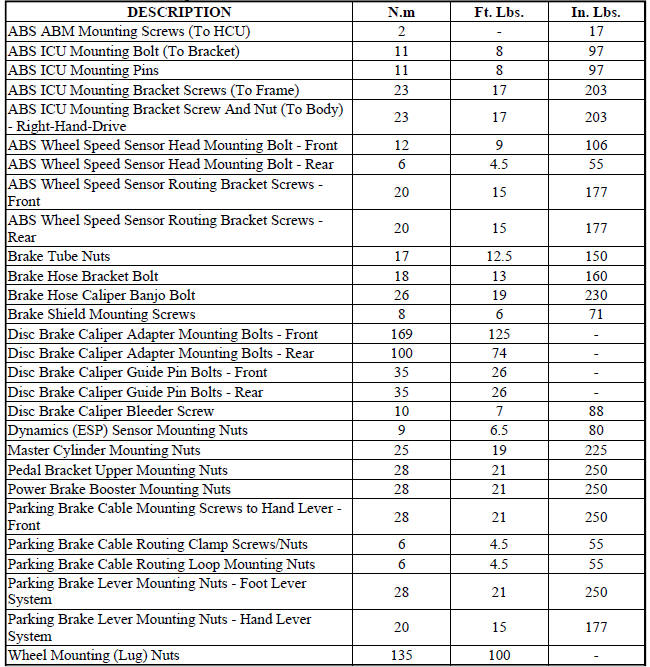
-
2010 Journey Service Information on CD
John/Horace replied to rcatcheside's topic in Maintenance & D.Y.I.
Just because it’s not supported doesn’t mean you couldn’t use an explorer version offline to run the disk. Maybe print out some useful critical torque charts etc for safe keeping. I guess Macrocrap is trying to force people to windows 1910. -
2013 Journey 2.4L oil pan replacment
John/Horace replied to ddpierce's topic in Engine & Transmission
After finger tight dry time for atv. Don’t go to full torque in one step, go to full 105 in pounds in three lower steps. Start in the middle of pan and criss cross outwards, don’t start at outside corners first. Unless you find Mitchel site telling you other wise. -
The google.... The diagonal arrangement has been the default for several decades now. A diagonal split is safer in the event of the failure of one circuit: it leaves you with one front brake, whereas a F/R split could leave you with rear brakes only, and a vastly longer stopping distance.Jan. 21, 2017
-
Cross bleeding for air, section of clear vinyl 1/4” hose on bleeder screw to see the air bubbles. Nickel copper alloy brake line, not old school steel. Flares easy, no tubing bender unless you are ver fussy. Lasts great in rust belt areas, most performance guys use it now. Labor savings makes the extra $2 per foot cost negligible. Good for classic cars. Even metric bubble flares on first try by non mechanics.
-
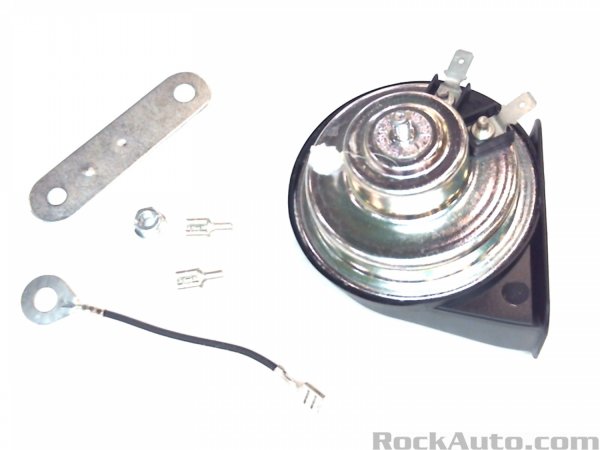
Horn Shuts down engine ONLY
John/Horace replied to Deadboltdon's topic in Electrical, Battery & Charging
What’s the verdict???? -
Patience and the right electronic flux and solder, and a nice butane solder torch. Daughter in law had her 2.4 sensor changed last year. Car randomly stalling out. I’m 4 hrs away so couldn’t help. Local FCA dealer is actually pretty good, I think labor only 0.5 hr. I have changed several CPS sensors on a variety of brands, have never had to do a relearn. There is a manual relearn procedure someone posted on this site. Seven or eight steps. I would pay a little xtra for the oem factory sensor, pretty important part. This guy changed CPS , several cam sensors etc without a scanner or relearn.
-
The last four speed standing, more or less. Sometimes simple is good. Daughter in law has a 2012 journey 4 speed, with just over 60k miles in it, I have driven it a bit, seems to work fine. Could use more gears, but is actually less clunky than the 6 speed. Heat shrink and solder is time consuming, but a good permanent fix IMO.
-
The caliper piston needs to make contact when pressure bleeding to properly push the air out. I have had a rear disc brake caliper not making contact with new pads and rotor on a Hyundai vehicle. It had the locking parking brake caliper pad set up like on Journey. Cycling parking brake did not seem to help any. After messing around I ended up adjusting piston for more contact and no gap. Air then pushed out with a gravity bleed, and pedal cycling. So this is correct helpful information for Journey rear calipers with air trapped in system. Pedal height is also affected by pad wear, new pads keep it slightly higher.
-
Welcome to the site, great to have more strong diy guys on the car site. I worked as a millwright mechanic for most of my working career, so car repairs became one of my hobbies in retirement. My wife’s 2014 awd still has the original tranny with 200k kilometres, and a few oil changes. Fingers crossed. They are a clunky shifting tranny most of the time, the 6 speed. You mentioned wiper, is that the wire harness through the hatch wires breaking ? Driver door window switch is just a swap out , correct. Has surfaced a few times here. Anyway, welcome.
-
2013 Journey 2.4L oil pan replacment
John/Horace replied to ddpierce's topic in Engine & Transmission
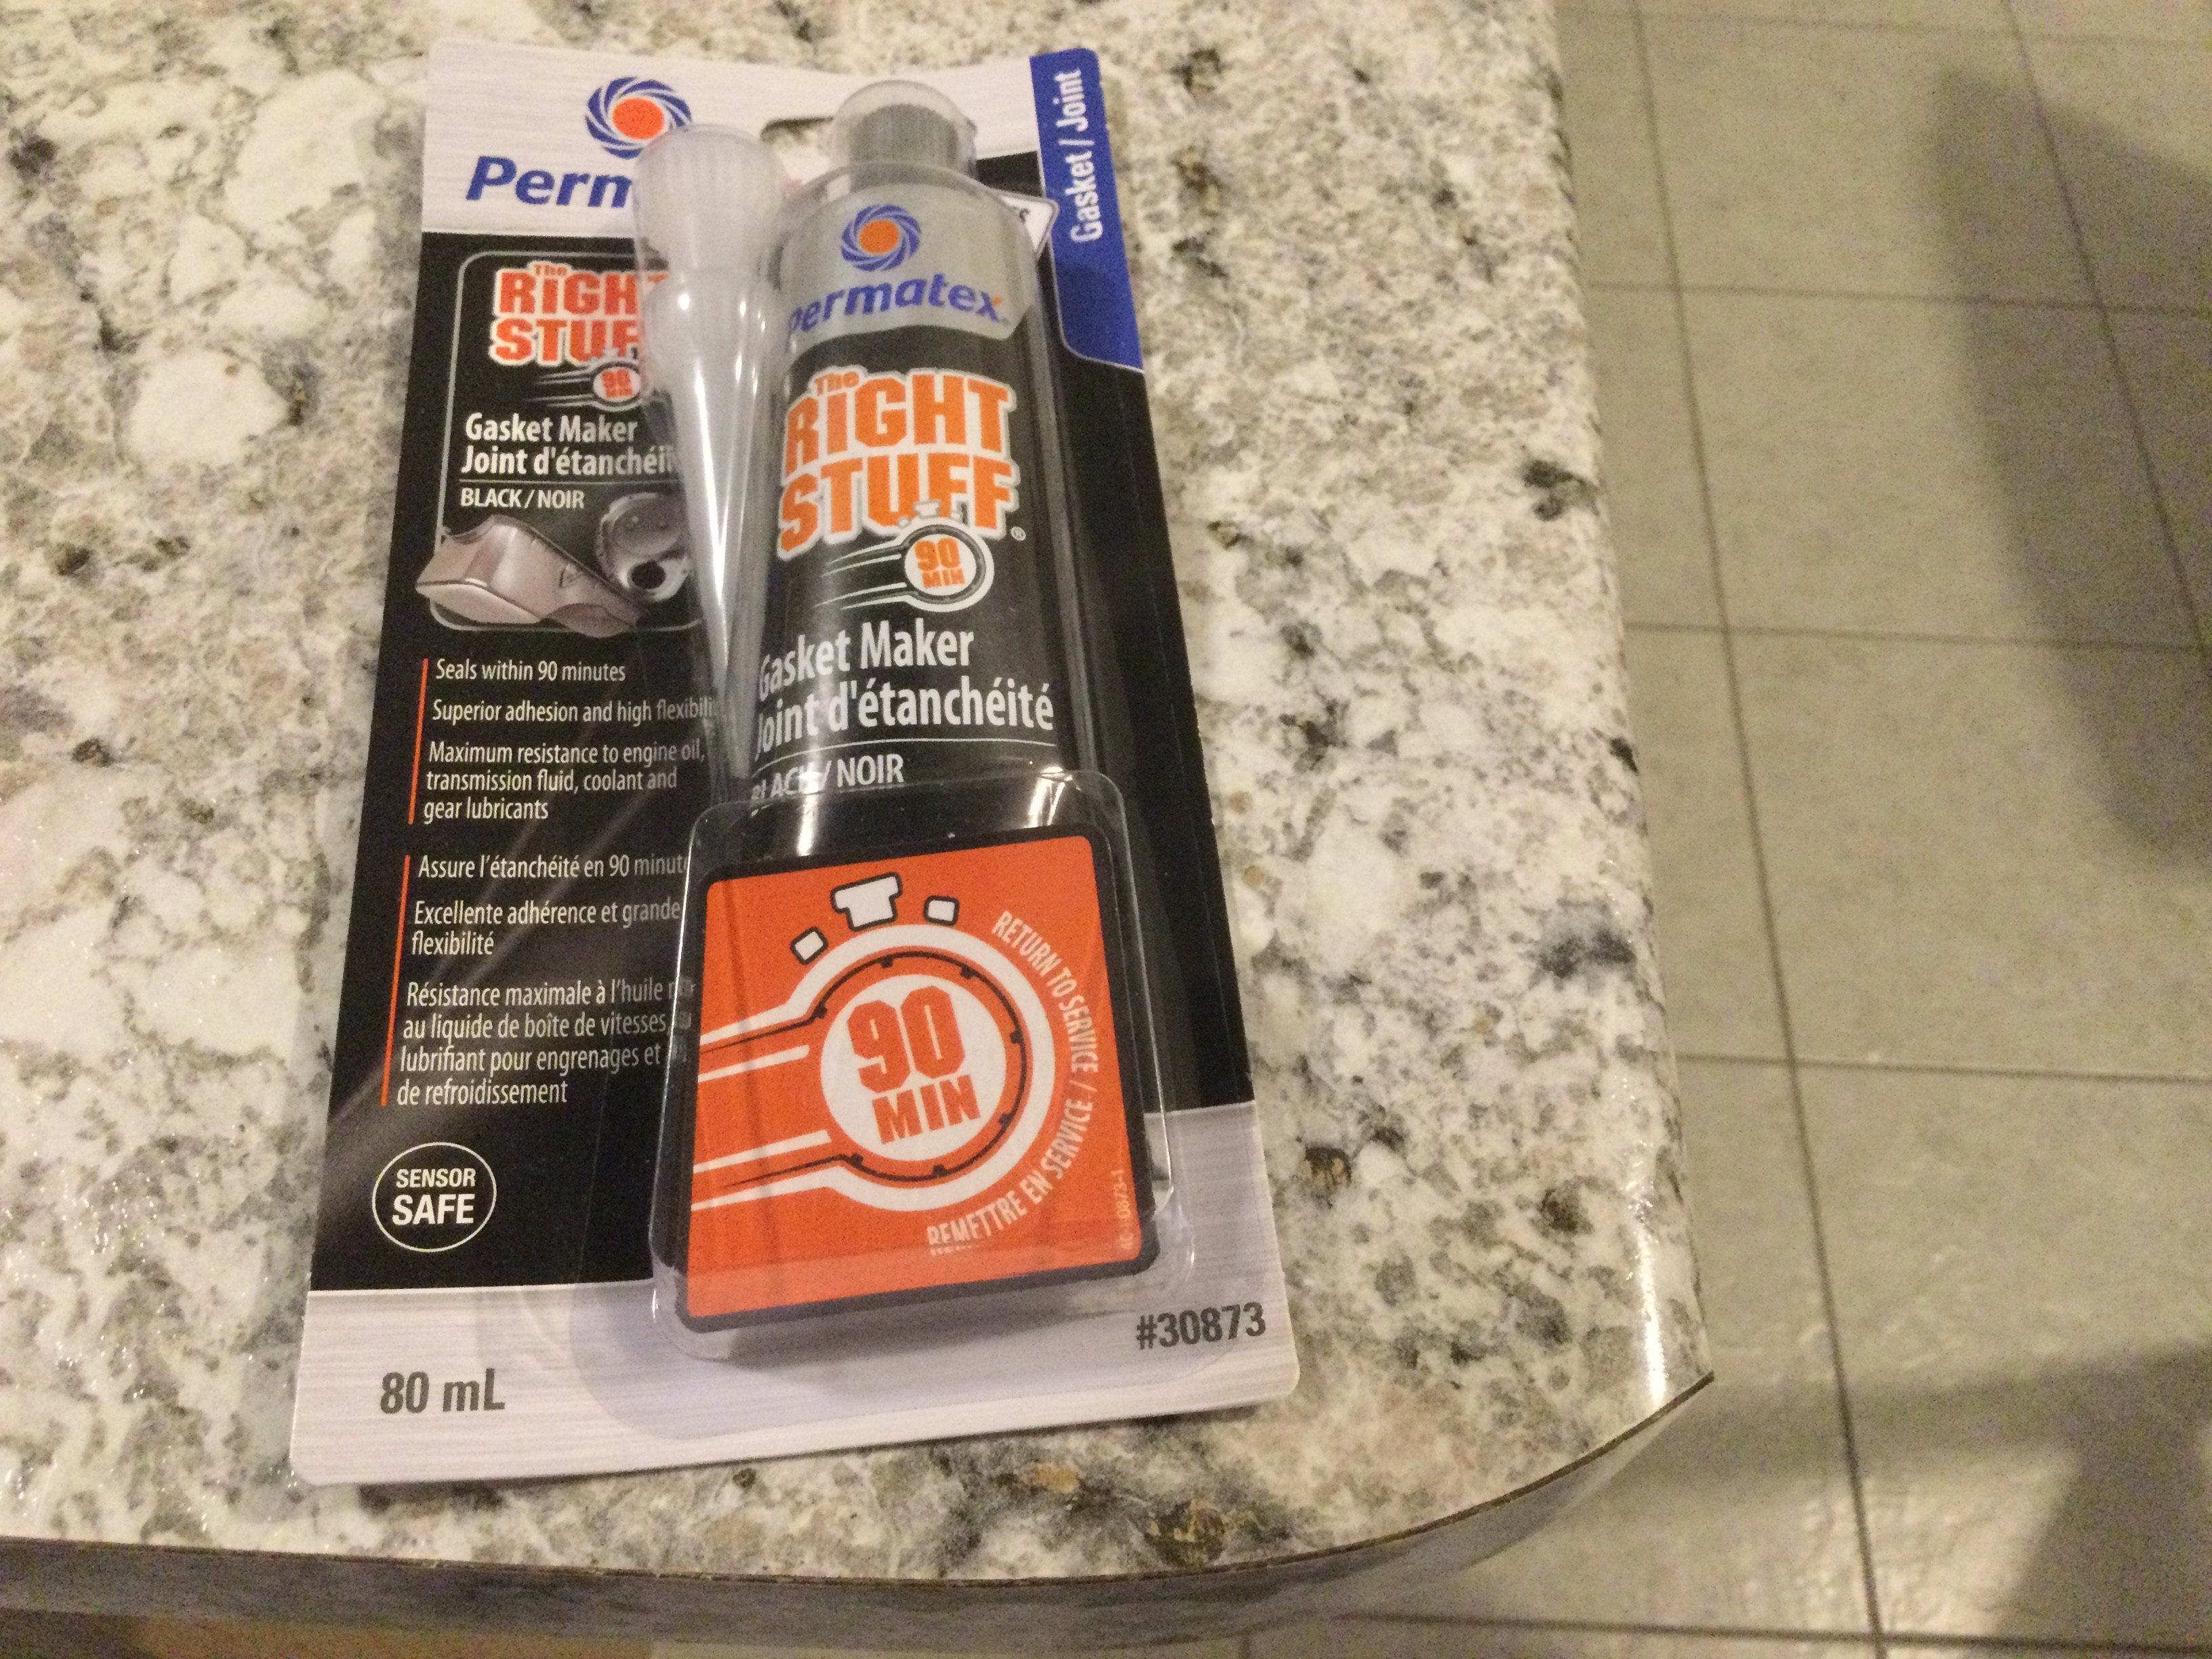
Mitchel on line login site might have some info. I hate cork style gaskets, have had issues in the past. New oil pan should have had a recommendation. Straight rtv meant for oil and 24 hrs drive time should work. Degrease,with lacquer thinner and wait an hour ish with finger tight torque on atv first, then do final torque. There is a 90 min dry atv, I’ve used once successfully, pic below. With oil dripping down on your degreased surface, it’s a little tricky, gotta work fast. Some vehicles like F150:use an aluminum crush shim with an attatched rubber gasket, dry no adhesive used, drive immediately on their transmission 6R80. Nothing to clean and gasket/shim even reusable. But $40 to buy new one.
-
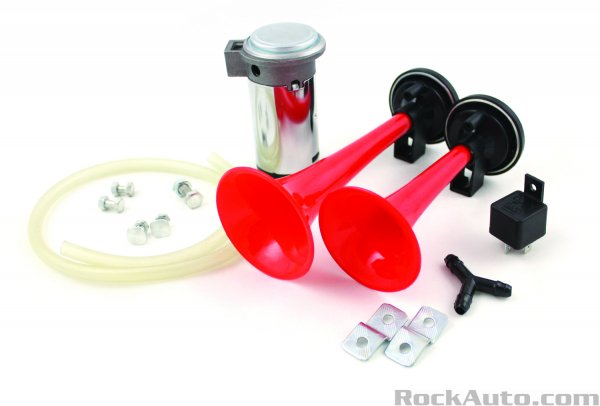
Horn harness would be female I think. Might have to buy spade clips and just make up your own pig tail. Did the air horn comes with its own relay, Safer with a relay for add on assessories.
-
He said thermostat so I assumed he did it. If not orange but green stuff, yeah especially important for 2011.
-
I would get to the fluids right away if you don’t have service records. Front PTU , rear diff, transmission filter and oil for sure. My wife’s2014 RT is just at 200k, got it at 120k. Fairly good car for the price. Were the bearings getting loud or was it abs/traction control light that triggered change.
-
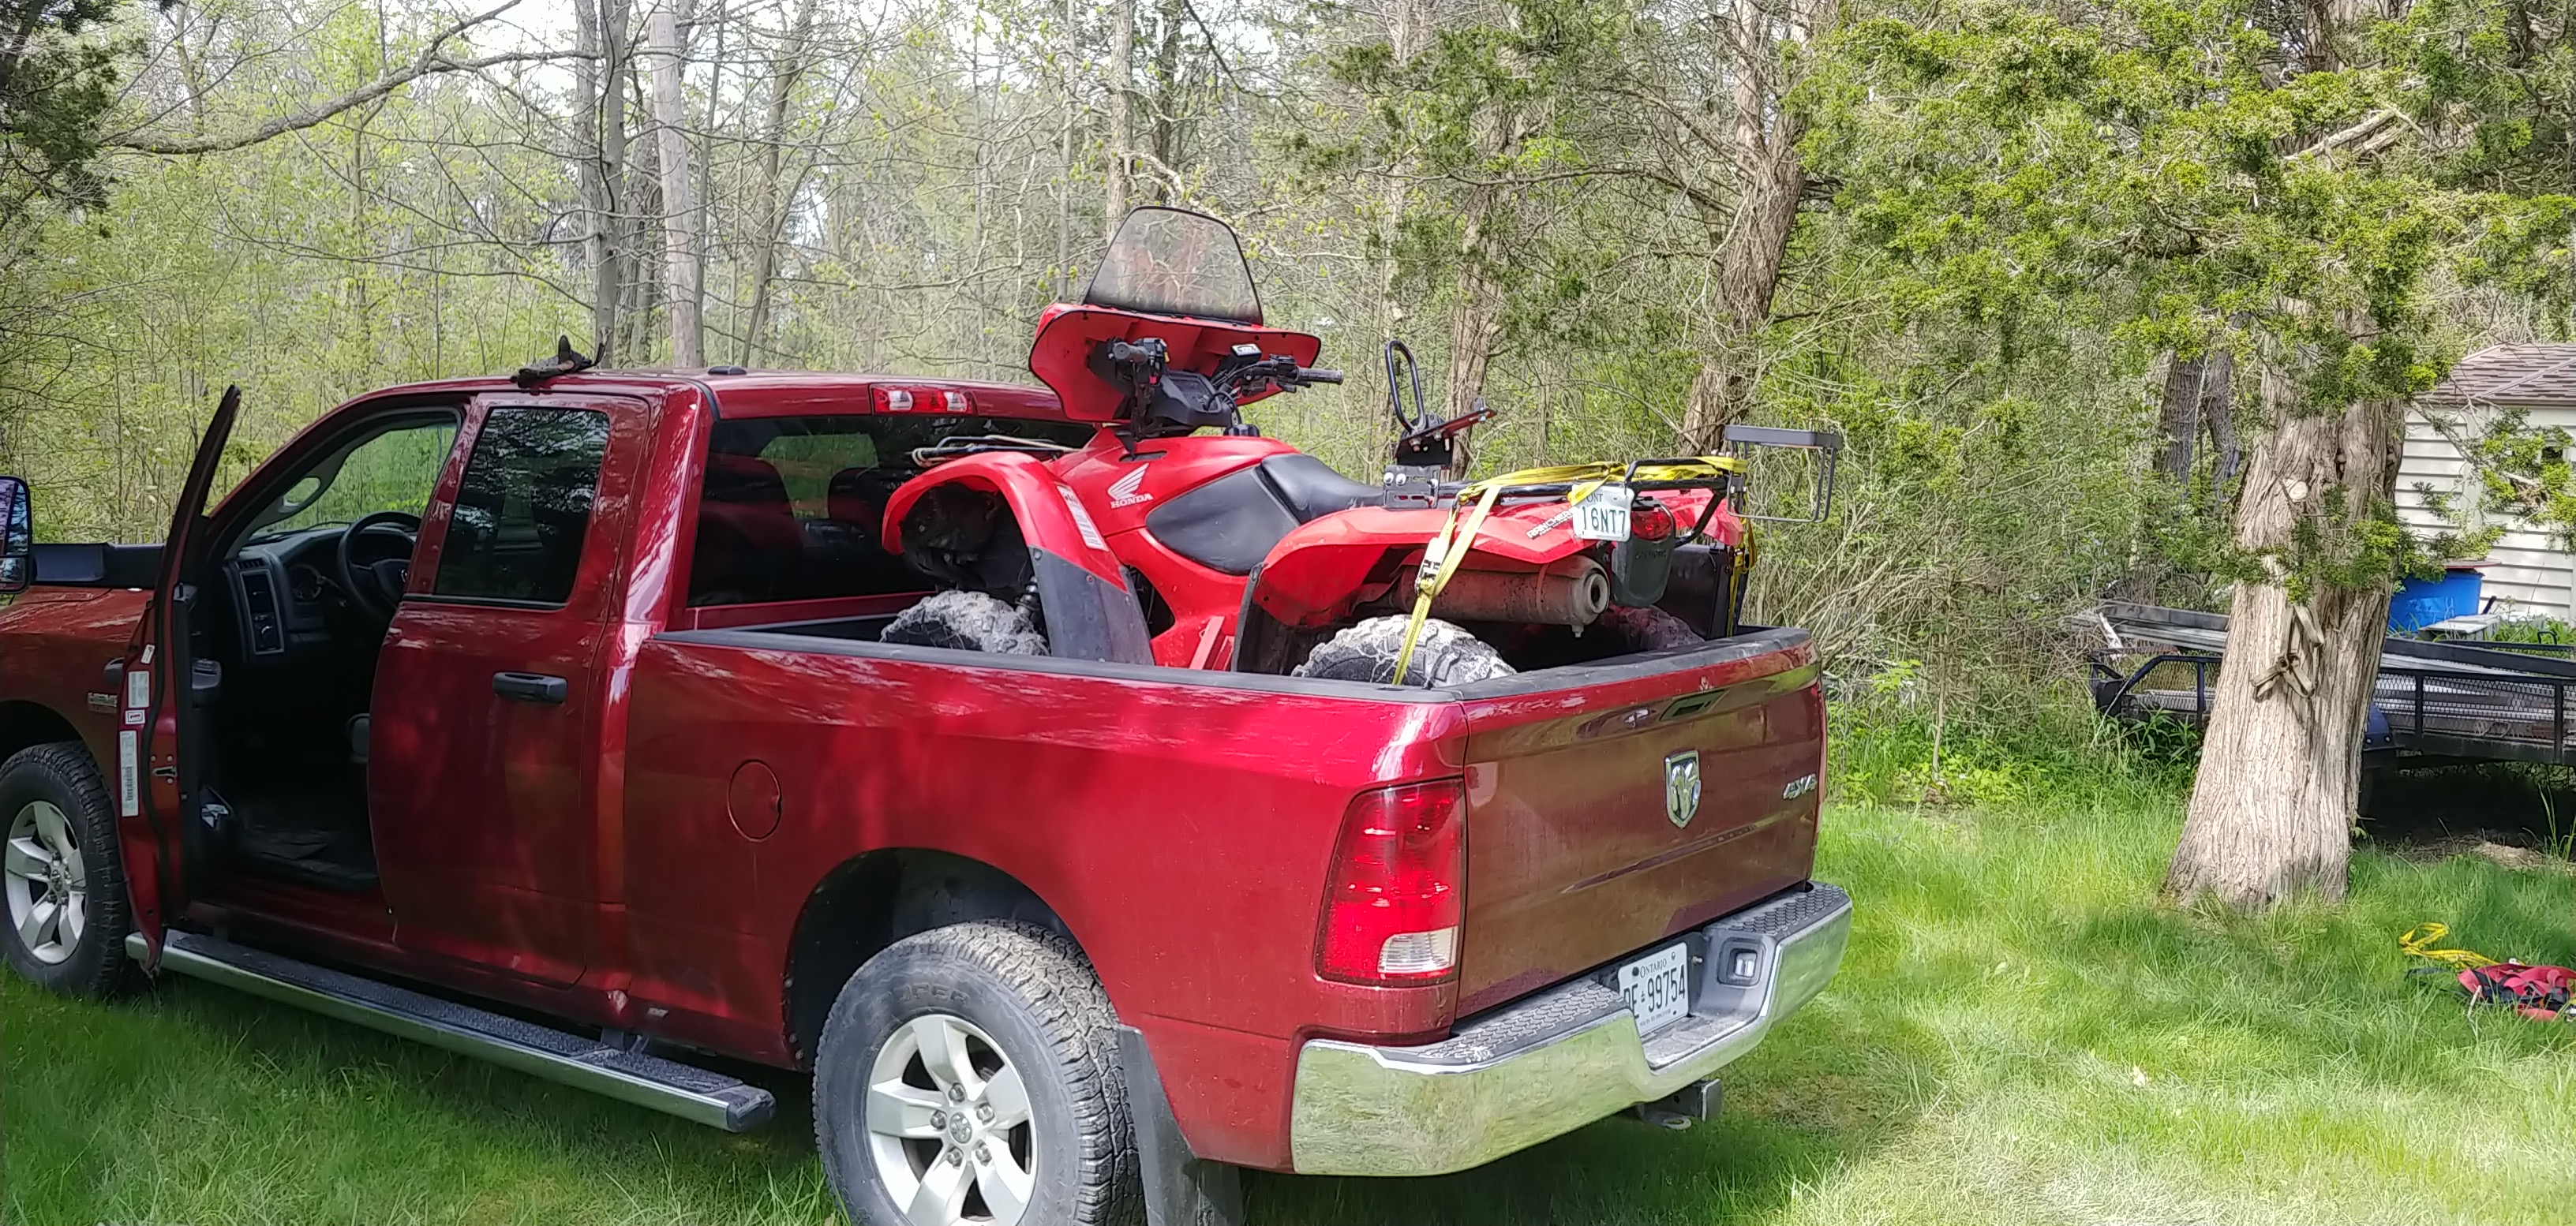
My ram last week. A quad in the ...quad cab with a shoe horn, just fits. It spent the winter at my brothers plowing snow.

-
Thanks for the detailed info. Seems like you are on the right track. LKQ is a big auto recycler site that lots of people use, another option for the future. Checking the fluid condition in rear diff and front ptu would be useful. Metal filings often show source of wear problems. Sliding extension magnet in drain plug location after oil is out helps the search. My rear diff side seals started leaking at 100k miles and had to be replaced, awkward time consuming repair. Seals were corroded and crumbling, not physically worn out. If metal filings in your old diff and nothing in the used unit, I would use the eBay diff. I’m sure you already have that in mind. Did driving without the rear drive shaft cause any dash lights to come on, like traction control. Some people with an older awd might not want to fix diff and coupler and just drive vehicle. Good info for the site. Cheers, good luck with your repair.
-
Are they dropping pan and changing fluid as well, or just scanning for codes while driving.
-
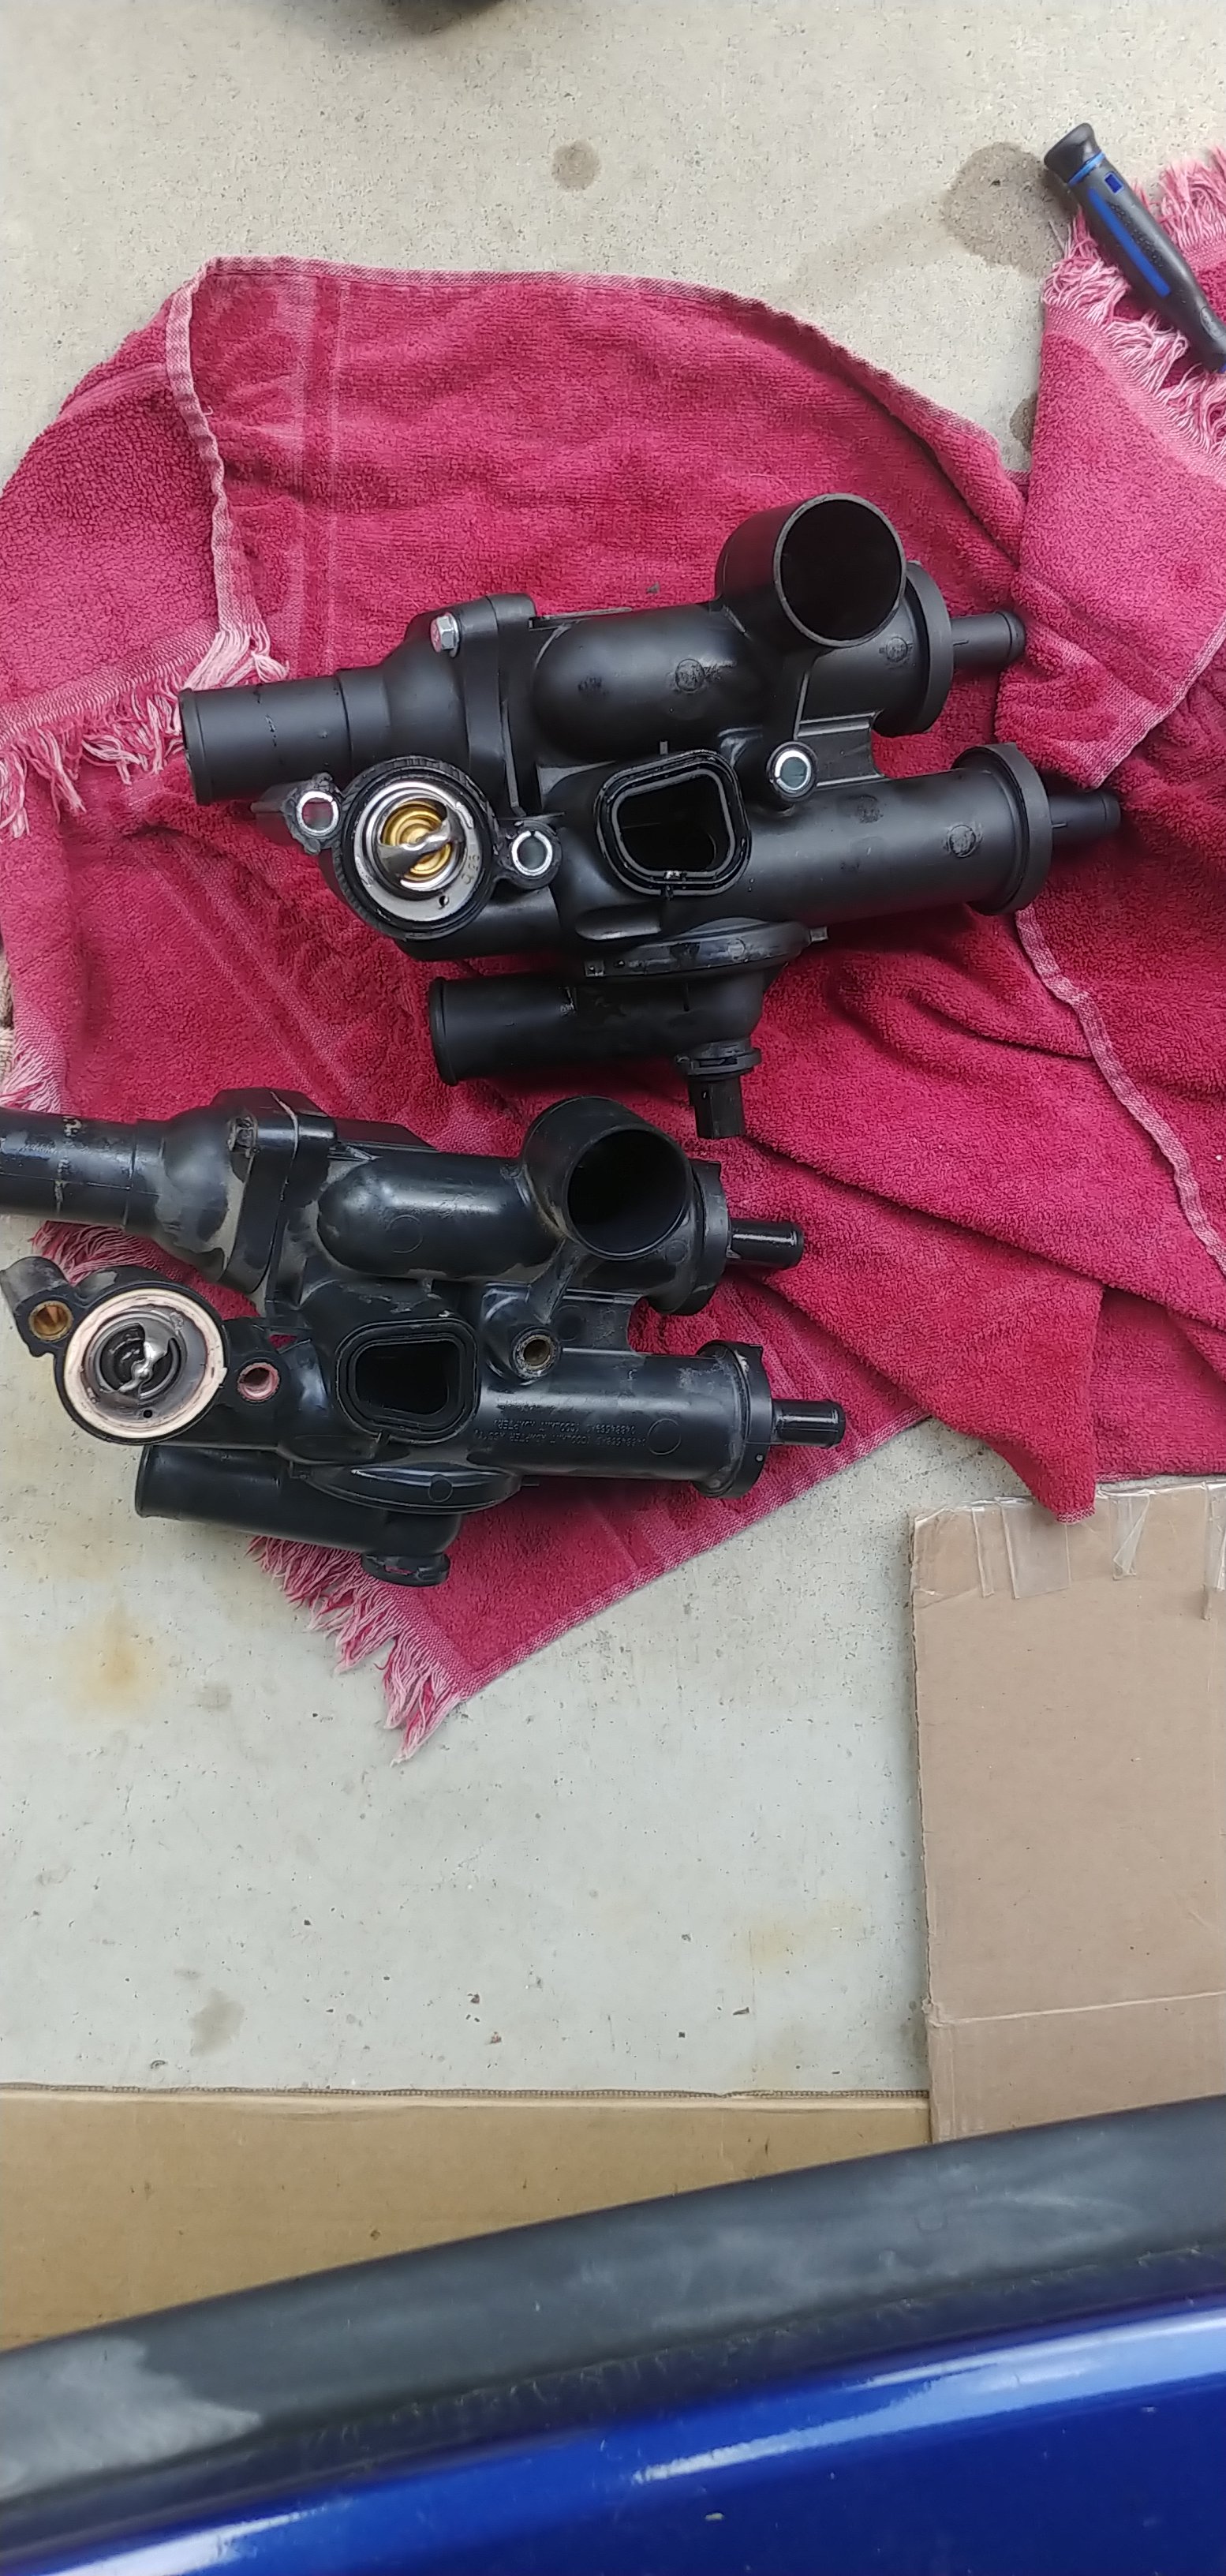
Changing 2.4 thermostats cooling housing
John/Horace replied to John/Horace's topic in Exterior & Body
I’m using the used oem unit with new gaskets and thermostats from the Gates unit. The oem unit isn’t sold as a complete unit, you buy each gasket and o ring and thermostat individiualy and the housing separately, ends up being 4-5 times the price of after market. It takes an hour-ish to change the housing, a drip won’t strand you, people can decide for themselves I guess. Just general info for the site. -
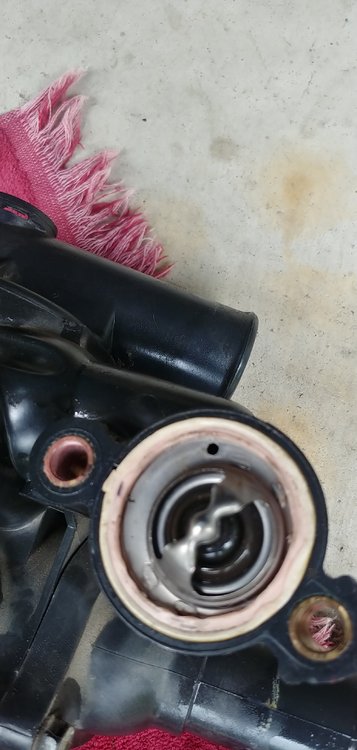
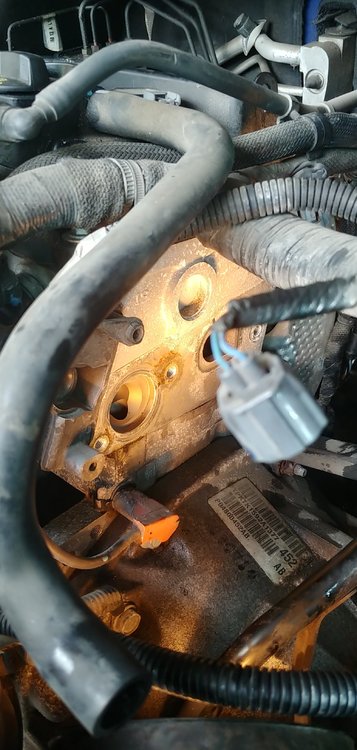
Steady drip on daughter in laws 2012 Journey with the 2.4 engine, 115k kms on car. It has the orange long life glycol, decided to just replace it all at the same time, still appears pretty clean but it is close to the ten year mark. Drip is on the side of the cylinder head right where one of the thermostats is mounted. Purchased the whole assembly with new thermostats, large o ring for rear inlet pipe included, made by Gates. It didn’t have the temp sensor o ring, but I have an o ring assortment set that had the correct replacement. The cooling manifold is held to the intake head by three 13 mm bolts, torque spec is 89in pounds. Installed new parts and seemed ok for one day then a drip came back. This time it was the square return gasket beside thermostat, it was new and installed on the Gates replacement assembly. Checked bolt torque and it was very close, decided to remove and inspect all gaskets. The new assembly when being installed didn’t dry fit in place as easily as the used original part, doesn’t sit flush to head with 20 pounds hand pressure. Moved all gaskets over to the old original plastic assembly and reinstalled it. No leak now for several days now. Not a difficult repair, just messy with glycol. Never had an issue with Gates replacement parts before, it seems cheaper made than the factory part. Metal grommets instead of copper, thinner flanges on secondary thermostat housing, stud mounts flimsy.

-
On second thought the code would probably be in the firmware for the CD player itself. Alpha obd is for the Journey electrical operating systems only.
-
Alpha obd program might be cheapest way rather than dealer.
-
Get an estimate from a tranny shop. Sometimes it’s only sensors and they can fix it in place, which isn’t as expensive. Is the 2.4 or 3.6 engine.
-
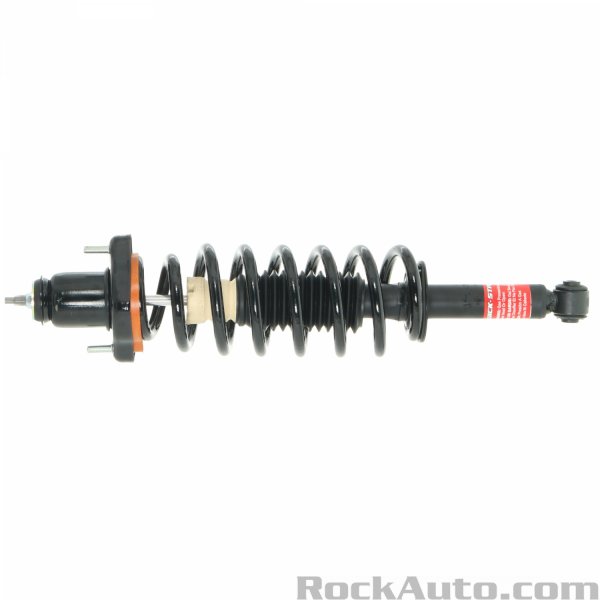
Getting Rear Strut off of 2010 Journey
John/Horace replied to Newbie's topic in Brake, Chassis & Suspension
When there is a camber bolt mount it changes alignment, so people paint mark fastner and try to assemble to same spot. So in this case you should be okay. Mechanics will say you should always do an alignment after any suspension work, regardless. The front struts have camber adjustment alignment bolts like in pic. Rear don’t, as you can see with the removed bolts you have.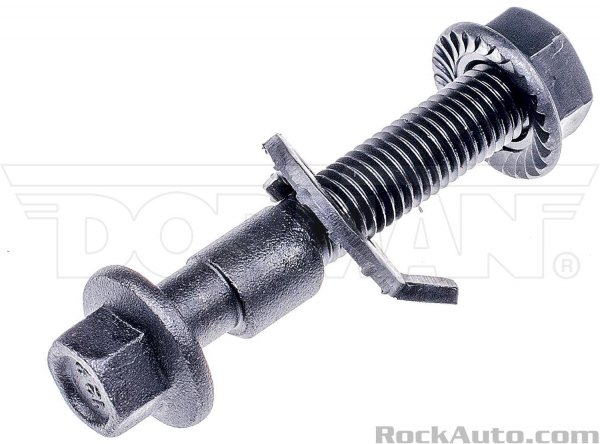
-
Getting Rear Strut off of 2010 Journey
John/Horace replied to Newbie's topic in Brake, Chassis & Suspension
Sometimes compressing strut slightly can allow pivoting strut loose. The rear lower lateral arm connection at wheel hub spindle could be unbolted for more travel, I think. Lots of PB Blaster or penetrating oil to free up rust.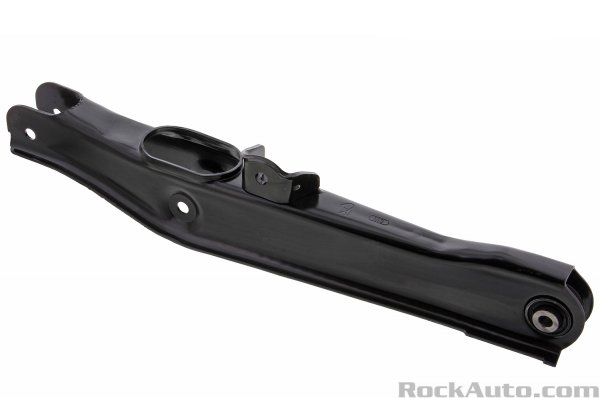
-
Getting Rear Strut off of 2010 Journey
John/Horace replied to Newbie's topic in Brake, Chassis & Suspension
I’ve never removed a rear strut on a Journey. But I have removed them on numerous other vehicles. It should just pivot down with the lower lateral links. Are you sure you have all the fasteners from the upper strut mount removed? Quite a bit of rear interior panels need to be removed to access the two fasteners (usually on most struts) on the top of the mount. The mount can be a little rusted in sometimes, may need to pry a bit.