-
Posts
1,835 -
Joined
-
Last visited
-
Days Won
188
Content Type
Profiles
Forums
Gallery
Everything posted by John/Horace
-
Auto recyclers might be a good source for a blue tooth module. The chrome rims always pit from brake dust, the grey powder painted 19” rims last better. Mopar on line parts are cheaper here. https://www.moparpartscanada.ca/
-
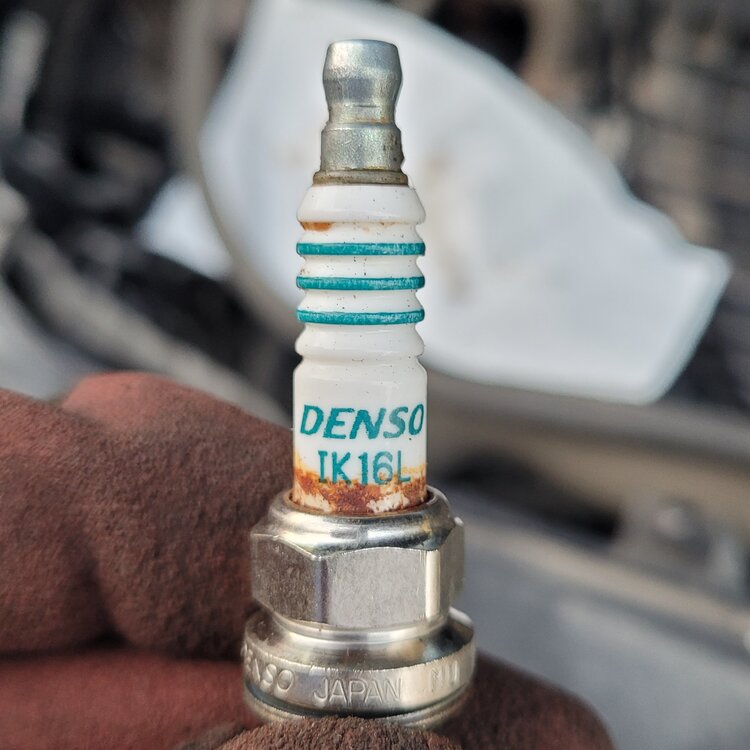
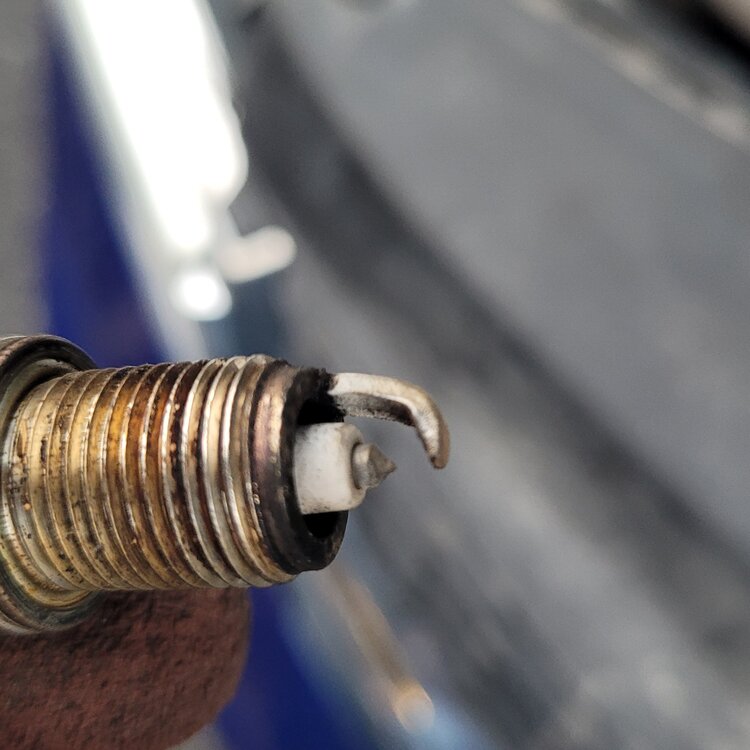
No hesitation or fuel economy issue. Could have regapped used plugs but decided for new NGK single plat cheaper plug. Lots more info on BITOG site. My pics of used plugs below. Still running orig coils at 165k kms(100k miles), dash gauge fuel rating was showing 9.6/100 kms, normal. https://bobistheoilguy.com/forums/threads/clarification-on-upgrading-spark-plugs.302965/
-
From bob is the oil guy forum, long time established internet site. Here's what NGK emailed back to me today when I asked if there was any data to support the idea that it is o.k. (or not) to use platinum or irridium plugs in a FCA vehicle that came from the factory with standard copper core/nickel electrode plugs: "Hello, Thank you for your E-mail. I do not have any data for you, but the reason I believe they used nickel spark plugs up to 2013 is they wanted to keep cost down. After enough customer complaining on service life, in 2014 they switched to an iridium spark plug. NGK has the iridium version listed as an upgrade for the OE nickel for pre-2014 models. An iridium spark plug will always be more efficient in flame propagation than a nickel spark plug. Regards, Michael Durocher, Technical and Training Specialist , NGK Spark Plugs (USA), Inc."
-
As you accelerate and brake these mounts are affected on transverse mount engines. The exhaust takes some of the extra movement when the mounts are worn. You can end up with flex section leaks after a while.
-
I have heard of engine mounts doing that. The front to rear engine mounts or roll stops seem to have the most effect on handling. They are not normally hard to change. Rubber will look torn.
-

2016 Dodge Journey Alternator Not Charging
John/Horace replied to bustjesus's topic in Electrical, Battery & Charging
Electrical problems rarely visual. Intact means continuity to ground ? What is the voltage output with the ignition on. Amperage to ground also useful, but since it’s fed from ecm you need to be careful. Expensive item, so maybe skip for now unless your an electronics tec. Resistance measurement from ecm output plug pin to the harness fusible link, safer. Both ends isolated for test. My alternator produced proper charge for about 4 mins before it would drastically drop off. Warming up caused internal intermittent failure of voltage regulator. Quick bench test wouldn’t have shown my issue. -
Welcome to the forum. Could be a lot of things. Always start with scanning for codes first, even if no light on dash. Parts guessing gets expensive fast. Parasitic load, however, is power that drains car battery when it’s not running. Doesn’t set a code. Best wild guess for most common Journey parasitic load is Bluetooth module staying on. Pull the fuse in passenger side fuse box labelled HFM for hands free module. Put a charger on battery for a few hours to get it back to 100% charge. A multi meter is needed to trouble shoot parasitic draw…if that is the problem.
-
Welcome to the forum. Which engine, milage on car, any major work done on car. Could be a lot of different things. What does glycol look like. Is radiator fan coming on when it’s hot, is a/c being used at the time. Careful when engine goes to hot easy to damage aluminum engine. Put down windows run interior heat to help lower temp. Was a pressure test done on cooling system?
-
Welcome to the forum. Intake manifold seals on cylinder 1 can allow extra air if bad and set codes. Leak down test on cylinder could be useful. Boroscope cam to look at intake valve through spark plug hole. How is upper valve train noise, clacking when it’s running?
-
Our vacuum booster is actually powered by the electrical system and a separate pump. Fairly common I believe. Not residual engine vacuum like older cars were. So light pressure or even slight travel like OP is saying triggers a switch on brake pedal. Cars then starts.
-

Replace JUST ball joints?
John/Horace replied to x_orange90_x's topic in Brake, Chassis & Suspension
I like the lower ball joints that come with a grease fitting. Which are normally a premium part. A few shots a year and you won’t replace them again. It’s all varying grades of China and Mexico. MOOG stuff after it stopped being US made was often Korean made and was still slightly better than the rest. The offered part warranty can be a crude indicator of quality. Mopar oem stuff is often from China now. But I think they are made to a higher spec and better than no name brown box China stuff. Can’t really gauge quality of rubber and metal alloy used by eye. -

Charging system 101. With diagrams.
John/Horace replied to Dean H's topic in Electrical, Battery & Charging
Too bad this post can’t be be stickied on an electrical forum like some sites do. Very very useful for people without a Mitchel login. Search option is crude and awkward. Ground zero for complex electr problems. Even the title of this post…is so appropriate. Someone deserves member of the month award! -
No leak during two storms now. The passenger front door where leak is had a bent hinge from an incident my wife had with a gust of wind. I managed to bend back hinge and adjusted striker plate so door closes properly again. The water on the floor could be related to this prior incident from Feb of this year. Although there was no leak at the time. Two 3/16 drain holes were drilled in the channel underneath the door sill. Could not seal out water from entering door frame channel via wheel well. Sealed a lot of cable openings, added weather stripping to rubber seal around the door etc. Adding drain holes was only thing that finally worked. I also cleared crap out the existing drain holes, which work better now. But I started doing that first and by itself was not a solution.
-

Replace JUST ball joints?
John/Horace replied to x_orange90_x's topic in Brake, Chassis & Suspension
Some arms are welded together pieces of metal. Journey is a solid stamped assembly, no welding so they last well. Captured nuts can be an issue seizing on control arm hardware …. a real pain. Unless rubber is crumbling I would not change them. Oem have two yr warranty for $275each on RockA, Moog are $76 for 3 yr warranty, Mevotec are $55 for a 5 yr warranty. -

Vibration on the steering wheel and chassis
John/Horace replied to Kiril's topic in Brake, Chassis & Suspension
All wheel balancing is not equal. At the autobahn speeds you mention you need better than ave balance. The 17” being better is a clue, because it shouldn’t matter. Find a Porsche BMW shop with a Hunter Road Force or other high end German unit. High speed dynamic vibration analysis equip can be used in problems like this. Try a different shop. Trouble shooting can be tricky. -

2009 Yourney doesn't start after ECU replacement.
John/Horace replied to richard033's topic in Electrical, Battery & Charging
Milage on car, engine size ? How did you test an ecm yourself, you must have a very high end scanner. Crank no start causes is a very long list. Trouble shoot via codes is always the starting point. Only cheap wear item that can cause no start and not always trigger code is CPS crank position sensor. OEM are around $30 us. Common 2.4 engine issue, heat vibration wear them out eventually, often by 100k. If it’s a programmed chip key, try the other key. -

Electronic Throttle Control light coming on
John/Horace replied to TRONIC1's topic in Engine & Transmission
Always start with what engine and what mileage, recent work performed on car. Scanning for codes is the first step to avoid throwing parts guesses at it. Try putting it in neutral next time it’s a no start. Park neutral switch possible. Does a jump start start the car afterwards ? Lightning bolt symbol on 2.4 engine is often electronic throttle body. Wear item that goes by 100k ish miles. Should show a code for it. Approx $150 for Hitachi oem unit from RockA, about 30 mins labor. Does not usually cause a no start, normally just limp mode. -

2016 Dodge Journey Alternator Not Charging
John/Horace replied to bustjesus's topic in Electrical, Battery & Charging
On older cars the alternator was not hooked to a bms battery management system. On this vehicle it’s the pcm that regulates voltage via a 5 volt feed wire going to alternator. It’s varies this voltage depending on system load. So not necessarily battery voltage 12.5 ish at the alternator on both wires. Part of pcm that controls voltage could be faulty with rest of pcm still working fine. Or could be wire harness issue. Charging system wiring diagram needed. Fusible link by starter mentioned by Dean H has to be checked for output voltage. https://www.chryslerminivan.net/threads/alternator-or-pcm-update-fixed.179009/ -

What is this hose, why is it disconnected and leaking
John/Horace replied to jaymclure's topic in Engine & Transmission
You must have rear heat in your Journey. Removed the damaged leaking section of aluminum coolant line, cut it out with a plumbing tube cutter tool, will leave nice clean non jagged ends. Buy a 3-4 foot section of rubber heater core line that is big enough to fit over an ends of the aluminum line. Probably around 1/2 inside diameter. Add gear camps on the section that slides over the aluminum. Several tywraps so new hose is well supported. Top up and bleed glycol system of trapped air from plastic bleeder screw in plastic thermostat outlet on engine if 3.6 engine. Some people just make up a bypass hose and don’t bother with circulating through heater core. -

P0302 Cylinder Misfire on 2015 V6 - Bad Head?
John/Horace replied to Bitmapped's topic in Engine & Transmission
How many miles on the engine, curious. Intake manifold gaskets can cause the same code. Should be replaced when plugs are changed out. Car accident and micro crack on intake plastic can also cause that code. There is a glycol test to prove if it is head gasket, but often it overheating issues at highway speed when it’s cracked head. -
The max torque spec is stamped on oil filter assembly. I think it is 25 N/m or 18 ft/pds. So not much. Dizzy/RT your small leak might be your pcv valve. My failed around a 100k, started to drip oil from flanges. Air flow can make drops travel to other locations. It’s not that cheap to buy.
- 13 replies
-
- oil filter mount
- 3.6l
-
(and 2 more)
Tagged with:
-
Water pump change on 3.6 requires working threw passenger wheel well. Motor mount needs to be removed and engine supported with a jack stand. A decent torque wrench needs to be used on aluminum engine work like this. Replace the plastic housing with thermostat/bleed screw ($20 item) while doing this job. Use a new pump, not a reman unit. If you struggle with brake jobs…stay away from doing this repair on a daily driver. Free advice worth everything you pay for it.
-

2012 Rear AC Keeps Switching to Feet Only
John/Horace replied to MoparJourney's topic in Climate Control
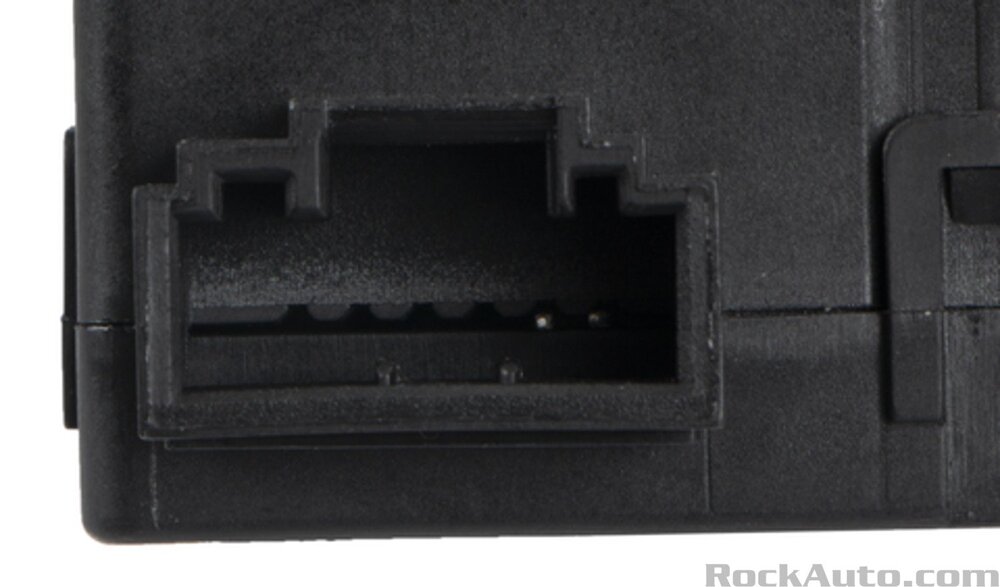
HVAC flow controlled by actuators (electrical switches) in the dash. Plastic internal gears start to stick and wear out. At least one of the 5-6 units is probably flaky. Some hard to get at behind plastic panels. Parts not that pricy, but because awkward access labor would be more than you think. One plug and a few Philips screws. Need to unhook battery or have someone with programmer hook up the sensors. Make sure elect plug pins match in replacement part. OEM china switches are better than cheapo aftermarket ones. Free advice worth everything you pay for it. https://www.rockauto.com/en/catalog/dodge,2012,journey,3.6l+v6,3015568,heat+&+air+conditioning,heater+air+door+actuator,10721 -

Dodge journey 3.6lt Engine number location
John/Horace replied to Adelaide Dodge's topic in Engine & Transmission
Should be stamped on block some where. The oil filter is your only real concern. The 9-13 had a slightly different cartridge than the 14 plus engines. Can damage plastic oil cooler housing with wrong one, look closely before swapping it out. Journey never got the upgraded 2017 engine 3.6 with more horse power. That was Ram trucks etc.


