-
Posts
299 -
Joined
-
Last visited
-
Days Won
7
Content Type
Profiles
Forums
Gallery
Everything posted by Totemus
-
http://www.bitrim.com/
-
Journeys don't have (at least my SXT) power mirrors, so, you can't use the smartcord (the cord that allows to power the radar from the mirror). I have power mirror in my Town and Country and it is very convenient and clean look, but doesn't work for DJ. Regarding the mount: I use Stickycup (https://www.escortradar.com/store/stickycup.html) to mount it to the windshield. The reason is that other mirror mounts are more expensive and I don't feel they will fit the DJ's mirror. I haven't tried, though, so it might work. Besides, with the windshield mount you can place the radar wherever you want, even above the mirror, which apparently is not an option with the mirror mount. I have SmartRadar, so I don't need to have it in the plain view, so I placed it behind and above the mirror. I don't see it from the driver's seat at all and it doesn't distract the view. One disadvantage: the stickycup is REALLY hard to unstick from the windshield. I read that escort received many negative reviews due to extremely strong sticking power of this unit. It is removable, but, man, it is so sticky So think twice before you place the radar and place it once. Regarding the wiring: SmartRadar came with several cords: cig lighter plug (not clean install), smartcord (doesn't work for DJ) and hardwire. I ended up hard wiring the radar to the fuse box as this is the cleanest set up you can have in the car, IMHO. You can buy the hard wire kit from escort or search ebay or amazon for cheaper deals. Easy DIY, or your electronics installer can make it for cheap (less than 1 hour of labor). Hope this helps.
-
Finally aftermarket responded to the demand. Looking forward for pictures
-

Switchbacks... Anyone Got Them
Totemus replied to Lobitz68's topic in Glass, Lighting, Mirrors, Sun Roofs & Wipers
Keep us posted and good luck! And sorry for misspelling your name, it was not on purpose, my ipad drove the spelling... -

Switchbacks... Anyone Got Them
Totemus replied to Lobitz68's topic in Glass, Lighting, Mirrors, Sun Roofs & Wipers
Lobito, based on your posts, it seems like you are thinking about a big project in lighting (retrofit + hid + LEDs). Yet just my opinion: I ended up working with a retrofitter to rebuild the lights. When I added up all the costs and labor, it appeared just not feasible for me to do it myself, taking into consideration my relatively poor skill level as well. Baking the headlights to open, removing all the bezels and maybe painting them, installing projectors and LEDs, additional wiring that might be required... I was overwhelmed with how much time it might take for me Regarding the Triton LEDs: the product looks great, but this guy still faced hiperflashing... Maybe they figured out how to eliminate this since then, but just to let you know... -
Yes, TYC not Tyco
-
Mmmmm! Debadged! Love it.
-
My 50 cents: chrysler lights are really hard to open, they use a grey compound, not black, don't remember how they call it, but this thing is really really heat resistant. Even professional retrofitters hate Chrysler lights for this. So I ended up buying aftermarket headlights for my another project (Tyco is really good, almost oem quality). It is more expensive, but: 1. You will still have your oems if busted with the project for any reason. 2. Aftermarket lights are easy to open (YouTube has all guidelines you need). One point about TRS: their customer service is good, I purchased from them several times and they were good every time. The quality... I don't have much experience with other kits, but my guess is you can have the same quality for lower price. For example, their bulbs don't look superior to other hids, Philips and Osram are better if you compare them side by side. This winter I installed the hid kit and had issues when the temperature was below 20F: the lights blinked and flickered. This disappeared when temp went up, so I guess the kit is vulnerable to low temperatures. Just my opinion and experience. Good luck
-

How to remove the brushed aluminum trim for wrapping
Totemus replied to Fireball111's topic in Interior
Confirmed. They are just snap on and the video mentioned was what I used as a starting guideline how to pry the trim for wrapping. As xdesign said, it is better to start from the sides closer to steering wheel and pry all the way down to vents. I started with the shortest part for practice as this was my first ever wrapping project, but it turned out pretty easy to do. I used plastic prying tool, but I guess flat screw driver with a cloth around it carefully applied will do, but prying tools are so cheap now, and you can use them for manyrojects, so my choice was to buy the set (something around $15) from ebay. Good luck and no doubts you will enjoy the result many times, because this trim is what you see every time you drive -
+ 8 hp on premium, +5hp on regular. $359/5hp=$70 per every additional hp. I think I are better off if you invest those in better tires and regular maintenance
-
Agree, especially if you go 20 or 22 My choice, however - replace the tires. I regularly have 2 kids in the back seats and just imagining what could happen if tires are worn out makes me sweating and rushing to the tire station
-

Turn Signal Flasher Relay
Totemus replied to jwin1845's topic in Glass, Lighting, Mirrors, Sun Roofs & Wipers
Sorry for multiple posts. One note: I did only rear turn signals. Didn't find plug&play resistors for fronts. -

Turn Signal Flasher Relay
Totemus replied to jwin1845's topic in Glass, Lighting, Mirrors, Sun Roofs & Wipers
Superbrightleds didn't work for me, though decent quality overall. I tried several LEDs that claim "built in" resistors, or "CANbus compatible", but neither worked properly without load resistors. I ended up with ebay LEDs and resistors. Works fine for 1/2 year so far -

Turn Signal Flasher Relay
Totemus replied to jwin1845's topic in Glass, Lighting, Mirrors, Sun Roofs & Wipers
I'm not disagreeing with what been said, but I resolved hyper flashing with load resistors. I didn't want to cut any wires, so purchased from ebay plug&play resistors that accommodate for both lamp and input wiring. As others said, you just need to find a way to affix them behind the lamp, but as this is a turn signal that is not supposed to be powered for a long time, overheating is not an issue, IMHO. -

How to disconnect negative battery cable
Totemus replied to Totemus's topic in Accessories, Modifications
I'm not going to do anything with the battery, but plan to remove the steering wheel cover. I read that negative should be disconnected (and wait 3-10 minutes) to prevent the airbag discharge. So it sounds like disconnecting the end on the strut tower will disconnect the battery, which is encouraging as I don't have to deal with those clips -

How to disconnect negative battery cable
Totemus replied to Totemus's topic in Accessories, Modifications
Thanks. It sounds like you are right, but I prefer to be extra cautious Without reading the manual I can't say if negative post removal is just the first step and should be followed by negative cable removal from the battery or not. -

How to disconnect negative battery cable
Totemus replied to Totemus's topic in Accessories, Modifications
How do you cope with the clips? I tried to extract one and broke it... How do you unplug them? -

How to disconnect negative battery cable
Totemus replied to Totemus's topic in Accessories, Modifications
I agree - there are terminals available, but if you disconnect them the battery will still be plugged. -
I need to disconnect the negative battery cable. Found out and was disappointed how hard it is to get to the battery in DJ. Does anybody know an easy way to get to the negative cable to disconnect it with minimum efforts? Thanks for any advice.
-
I didn't find blacktop grille for sale. I simply purchased an aftermarket part and painted in in black.
-
-
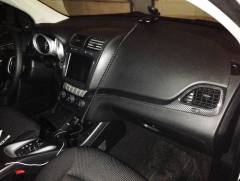
I didn't try that. Wrapped silver strips on the dash in carbon vinyl, though.
-
-
Thanks. I switch to MB Wheels TKO + Pirelli Scorpion Zero Asimmetrico (235/45/20)
-

Anybody tried Viper's SmartSrart?
Totemus replied to Totemus's topic in Alarms, Keyless Entry, Key Fobs, Locks & Remote Start
Thanks. Already installed Viper SmartStart


